The quality of dental services 20 years ago left much to be desired. Fillings of dubious quality, loss of teeth, bridges that injure neighboring teeth - the list is endless. The reason for such unprofessional actions of dentists is unknown. Dentistry has changed since then. Specialists acquired the opportunity to gain new knowledge and improve their skills at seminars and conferences. Familiarity with new techniques makes life easier for the dentist and increases the comfort of patients.
These methods include dental photography. The method allows you to track your treatment history. This is a way of regulating relations between clinics and clients, increasing the level of trust in dentistry and raising their prestige.
Key Goals
Dental photography helps achieve the following goals:
- Documenting the stages of treatment provides the patient with information about the procedures performed by the dentist and allows him to evaluate the quality of the work.
- Preventing misunderstandings between patients and dentists.
- The images provide the doctor with the opportunity to consider the upcoming treatment and assess the deficiencies and parameters of the client’s teeth. Thanks to the images, he gets a complete picture of the color, structure and shape of the teeth. Taking into account the data obtained, it is easier for technicians to develop crowns and inlays.
- Correcting the dentist's omissions. The specialist analyzes the work and eliminates errors in a timely manner.
- The use of dental photographs at dental symposiums and master classes demonstrates the level of professionalism of the dentist.
- Compiling a portfolio.
Working with pictures
Particular attention is paid to standardization and archiving of images. Information is stored from the moment of the client’s first visit to record dental problems until they are eliminated.
Standardization
The photograph is taken on a plain background. The camera is fixed at face level. The patient looks straight ahead.
Standard types of photographs:
- smiling face;
- calm face;
- smile;
- smile on the right side;
- smile on the left side;
- front teeth straight, left, right;
- close-up of front teeth straight, left and right;
- bite planes of the upper and lower jaws;
- upper and lower incisors in clear view.
At the time of the first visit, up to 8 photographs are taken in order to capture important moments for future work. At the discretion of the doctor, an additional series of photographs is taken.
Particular attention is paid to adjusting the thermal mode when shooting. Temperature is measured on the Kelvin scale. To adjust the color temperature, white balance is adjusted in the digital camera software.
A color scheme that is comfortable for the human eye is selected. Natural photographs with optimal color rendition are taken at a color temperature of 5300-5500 K.
Archiving
To work correctly with photos, you need to install optimizing software. Similar software is included with the equipment. The user views the images and consults the patient without additional time.
Archiving of photos is carried out using special programs. FotoStation helps you quickly sort your photos. Special search filters using keywords allow you to quickly find data for each client.
The program is not adapted to Russian-speaking audiences. Active negotiations are underway on the Russification of software.
Since a specialized program is not available to domestic clinics, specialists have to get out of the situation using other methods. A folder is created on the clinic’s shared resource with restricted access to the photo deletion option. In the folder, each doctor places photos of his patients, sorting them by last name. A client base of dental images is gradually being formed, access to which is provided to the entire clinic team. Image storage formats are JPEG and RAW.
Cameras for dental photography Nikon Dental kit
Nikon has been offering special Dental kits for several years now, designed, as the name implies, for dental photography. These kits are very popular among dentists because... They make it quite easy to obtain high-quality photographs of the oral cavity, extracted teeth, dentures, and so on. Dental photography can be used by dentists for various needs: for educational purposes, for sharing experience and advanced training, to facilitate the work of a dental technician, for advertising a clinic and promotion on social networks. It is known that most doctors are not professional photographers, and photographing the oral cavity is a complex process in itself, so it is not surprising that dentists are interested in equipment that would do their job as conveniently and simply as possible. Why Nikon?
Internal focusing. The Nikkor 60mm f/2.8G Micro ED and 105mm f/2.8G Micro VR IF-ED lenses, which come in Dental kits, have such a feature as internal focusing. In other words, they don't have a "trunk" that sticks out when you try to focus closer. This is extremely helpful when working at short range. In addition to the obvious inconvenience associated with the fact that the lens extends directly into the patient’s face, there is a second problem: flashes are usually mounted on this “trunk”, and when it moves, the angle of illumination changes, as a result, the area of the mouth you need may appear in the shadow, although you yourself weren’t moving anywhere.
An example of a lens with external focusing (“trunk”):
Which lens to choose, 60 or 105 mm? The answer is quite simple: if you strive for maximum magnification, macro 1:1, it is better to choose 105 mm: thanks to the increased working distance (the distance between the lens and the subject), it is much more comfortable for this purpose. If you don't need such a strong magnification, then you can save a little by taking a kit with a 60 mm lens, especially if you choose an APS-C format camera.
Focusing speed and accuracy. Both lenses have fast autofocus speeds (for macro lenses), and Nikon DSLRs with phase detection sensors focus accurately and almost instantly. In addition, both lenses support manual autofocus adjustment, so if you don't like where the camera focuses, you can quickly adjust the focus by simply turning the lens ring, rather than having to keep trying to get the focus on the right spot.
Focus points and electronic level in the Nikon D7500 viewfinder
Bipolar flashes with free movement and tilt. Two Nikon R200 flashes are mounted on the front of the lens on a special ring along which they can move freely (if necessary). You can place one on top and the other on the side, tilt them for point-blank shooting, or return them to their normal position when there is some distance between the camera and the subject. This way, you can illuminate exactly the area you need and do it as efficiently as possible.
No wires. Most macro flashes use a different power principle: the batteries are located in a separate unit and electricity is supplied to the flashes using a twisted cable. This is not very convenient: the wires dangle around, and if you actively rotate the flashes, they can get wrapped around the lens. The Nikon R200 flashes that come with the R1C1 are powered by CR123A lithium batteries. Now you can find rechargeable batteries of this type on sale, along with chargers. Synchronization with the control unit occurs wirelessly using an infrared pulse. The SU-800, which fits into the shoe on the camera, is also quite easy to use: control can be in full automatic mode, automatic with manual correction, or fully manual. Adjustment is easy: with a few clicks you can increase or decrease the brightness of both flashes or one flash relative to the other, up to complete shutdown. You can also control flashes through the camera menu.
Complete contents of the R1C1 kit: flashes, diffusers, control unit, installation kit, flexible holder for accessories
Image quality. Nikon cameras are famous for their high image quality, accurate color reproduction, low noise and other unwanted artifacts. At the moment, the Dental kit offers 3 cameras: the advanced amateur D5600 has a comfortable ergonomic grip (anatomical shape of the handle) - a rarity in the amateur segment. The rotating screen can be useful when shooting from awkward positions. The D7500 is a higher-end camera, with an updated high-sensitivity sensor, an advanced focusing module and a durable body. Its screen is also movable, but tilts only in one plane. And finally, the D750 is a full-frame DSLR. For dental photography, you can use any of them. We would say that for this particular task, APS-C models (D5600 or D7500) would be even preferable, due to the lower price and greater depth of field of the APS-C format. If you want to use the camera not only as a work tool, but also for your own pleasure, then the full-frame D750, of course, will show its best side here: the high photosensitivity of the “full frame” guarantees the absence of noise when shooting with natural light, and the shallower depth of field makes the photographs are truly voluminous. Lenses 60 and 105 mm, by the way, can be quite successfully used for shooting portraits and other photographs, as well as for shooting videos.
Nikon Dental kits 2022 are already available for order on our website and in Bright Photo Market retail stores.
Technical equipment
For fast shooting mode in high quality, the room is properly equipped:
- retractors;
- lamps with UV radiation;
- occlusal and lateral crystalline mirror;
- contrastor;
- cling film to protect the lens during operation.
The assistant is responsible for ensuring the operating condition of the equipment. The dentist is responsible for the quality of the images and settings. Proper distribution of responsibilities helps optimize the shooting process.
It is necessary to prepare the shooting location:
- choose a background (stage table or black matte fabric);
- prepare whatman paper and cardboard.
Lens, camera, macro flash
The clarity of the pictures depends on the quality of the digital camera. It is recommended to use a DSLR camera, which allows you to capture every detail when shooting.
European experts prefer the 70D technique. The camera is suitable for working in rooms with different levels of illumination and is capable of capturing an object from different angles without losing the quality of the images.
Characteristics of the flash for macro photography Canon Macro Ring MR-14EX:
- double lamps for brightness;
- LED bulbs;
- ring flash ensures even illumination;
- reliability and performance.
When choosing a lens, criteria such as quality, ease of use, functionality and affordability are taken into account. The listed characteristics are specific to the Canon EF 100mm f/2.8 USM Macro Lens Review.
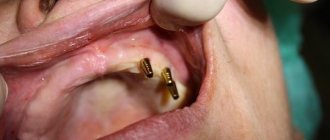
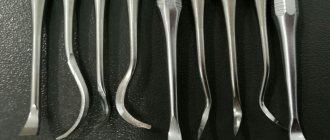
Retractors, mirrors, contrastors
Full shooting is not possible without additional equipment.
Contrastors are specialized devices for creating a dark background. With their help, the shooting is focused on the part of the dentition of interest. The black background highlights imperfections. It is recommended to choose anodized aluminum products that are suitable for steam and high pressure sterilization. Treatment is carried out with a soap solution. Chemicals damage the black layer.
Mirrors – used for intraoral photography. Glass, 3 mm thick, is coated with platinoids. Reflects light effectively and is not prone to oxidation.
Mirrors are fragile and require careful handling. The product is processed and sterilized separately from other equipment.
A dental photograph requires at least two mirrors – a lateral and an occlusal one.
Retractors – provide visibility. Devices in the form of hooks, plates, etc. used to retract soft tissues and hold the mouth open. Due to its soft structure, it does not injure mucous membranes.
Shooting technique
Macro photography of the inside of the mouth is a challenging task. To implement it, you must comply with the following rules:
- shooting in manual mode without autofocus;
- installing a contrastor at a distance that prevents glare;
- heating the mirror with hot water before taking photographs to prevent fogging;
- the nose does not fit into the frame with the upper front teeth;
- the dental arch occupies the entire area of the image;
- saliva is removed and chewing surfaces are blown;
- The lighting turns on and the flash is removed.
Dental photography is the solution to dental problems.
How to choose a lens for dental photography
A good photo is not only documentation of the process, but also an effective motivation for the patient for treatment. We believe that any dentist can take high-quality photographs without serious time and money costs for expensive courses. Today we’ll tell you how to choose a lens: what to look for when studying its characteristics and how to navigate the basic settings.
Focal length
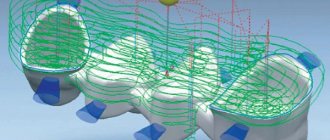
A lens is a complex system of lenses, but for easy understanding we will depict it as one. Focal length is, roughly speaking, the distance from the center of the lens to the matrix and is indicated in millimeters.
The viewing angle and scale depend on the focal length. The viewing angle is everything that fits into the photo from left to right.
The diagram shows how viewing angle and focal length influence each other.
The longer the focal length, the larger the subject will be. If you have a lens with a short focal length, you will have to get closer to the subject to get the same size.
But you can’t get infinitely close: try bringing your palm close to your eye and examining it. To prevent this from happening, look at the minimum focusing distance (MFD).
It will show the minimum distance to the object at which the lens can focus.
Special lenses for macro photography, for example, MICRO NIKKOR 105, have a small MDF. This allows you to take close-up and close-up photographs of small objects. For dental photography, lenses with focal lengths greater than 60 mm are used. Otherwise, to focus at a 1:1 scale, you will have to dig your heels in.
The lens can have a fixed focal length or a variable focal length with zoom. Macro zoom lenses are very rare. Incorrect selection of focal length will also lead to geometric distortions. When photographing an object at close range with a wide-angle lens, the fisheye effect appears. A “dental” photo on a smartphone will have the same effect. That is why whoever is closest to the camera in a selfie turns out worse:
In dentistry, you need to get an image at a scale of 1:1 or close to it. That's why they use macro and portrait photography. For these purposes, a macro lens with a focal length of 85 mm or more is suitable, which will reduce distortion. But no more than 105 mm, since the longer the focal length, the larger the MDF and the further you need to move away from the object. Macro lenses with a focal length of 85-105 mm are perfect for portrait photography.
Aperture
Another important parameter is aperture. It characterizes how much light can pass through the lens.
For lenses with a fixed focal length, as well as for professional zooms, the maximum aperture value is constant, indicated by the letter F or a ratio: for example, 1: 2.8.
Aperture is the ratio of the illumination of the actual image to the original brightness of the displayed object. Most simple zoom lenses have a variable aperture ratio that changes depending on the focal length. In this case, the range is indicated: for example, 3.5-5.6.
In bright light, the human pupil contracts, and in low light, it dilates to allow as much light as possible to reach the retina. In a camera, the aperture is responsible for this and is also referred to as aperture ratio. The aperture can be used to control the amount of light entering the sensor.
But by changing the aperture value, we influence the depth of field parameter of the imaged space (DOF). In photographs taken with different aperture values, you can see how the depth of field changes: the narrower the aperture, the greater the depth of field.
But a closed aperture will require more light, and then the object has to be illuminated additionally. In dentistry, photographs are often taken with a very closed aperture: say, 22, so that as many teeth as possible are in sharp focus. When shooting a portrait, the aperture width is usually 9-11.
The lens has a focusing ring. It allows you to move the camera away from the subject while keeping the image in focus. But the scale will also change. Just like moving your pressed palm away from your eye, you begin to see your fingers, your entire palm, your forearm, but more finely.
Full frame and crop lenses
Lenses are also divided into two types according to format: full-frame and cropped. The former provide full sensor coverage and are suitable for full-frame and crop sensors. The second ones are only for crop matrices, since they either won’t fit on full-frame matrices or will darken the corners.
In the table you see a breakdown of the symbols found on the lenses.
| Nikon | Canon | Sony | |
| Autofocus/focus motor | AF-S/SWM | USM | SSM |
| Vibration reduction | VR | IS | O.S.S. |
| Crop lenses | DX | EF-S | SEL |
| Full frame lenses | FX | E.F. | F.E. |
| Macro lens | Micro | Macro | Macro |
Our resume
So, for cool dental photos, you need a macro lens with a focal length of 85 to 105 mm and autofocus capabilities. Please note that it must be compatible with the camera body.