IMPRESSION MATERIALS
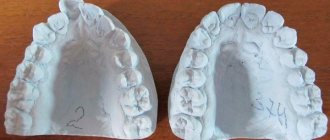
— auxiliary materials used in orthopedic dentistry to obtain impressions, i.e., a negative image of the prosthetic bed (teeth and jaws). Sometimes casts are called impressions, and materials are called impressions. Based on the cast, a model is subsequently created (a positive representation of the prosthetic bed), and dentures are made with the help of the cut (see).
The accuracy of the impression depends mainly on the quality of the impression material, which must have the following properties: low shrinkage, plasticity at the time of insertion into the oral cavity, harden in the oral cavity under conditions of high humidity and temperature, be easily inserted into and removed from the oral cavity, accurately reproduce the surface of the prosthetic bed and not deform when removing the impression from the oral cavity, do not have a harmful effect on the oral mucosa, and also do not have an unpleasant odor and taste, retain the basic properties during sterilization, and are easily separated from the material from which they are made models, do not change their qualities during long-term storage.
Attempts to create a universal S. m. that meets all the listed requirements were unsuccessful. Therefore, in order to obtain high-quality impressions, it is necessary to have a sufficient range of impression materials, choose and apply them correctly in each specific case.
There are hard, elastic and thermoplastic impression materials.
How to make an impression of a key?
To get an impression
, apply a thin layer of plasticine no more than one and a half millimeters thick to the metal plate.
The plasticine is lubricated with oil to prevent it from sticking to the key. Press the key
onto the plasticine so that it leaves a clear, even imprint.
Interesting materials:
When should you dig up rye? When should you dig up green manure? When should you plant Remontant strawberries? When should I register my quadcopter? When should Mulard ducks be slaughtered? When should you plant currant bushes? When should you pick winter apples? When should you fertilize blueberries? When should nitrogen fertilizers be applied? When should you dig up tulip bulbs?
How to prepare a baby model for “work”?
It is best to carry out work on making casts of arms and legs when the small model is calm. Pick a moment. This could be a dream or watching your favorite cartoons. You can find cartoons by following the link: "Cartoons for the little ones." There are sleepy children with whom you can do anything in this state. There is an interesting article about a child’s sleep: “Does your child sleep poorly? We are looking for possible causes and finding a solution to this problem.”
If you decide to carry out the work of making a cast while the child is awake, then be sure to make sure that the baby is in a good mood, he is not hungry and joyful. Does the baby move his fingers slightly during the impression? It doesn’t matter, it won’t spoil the final result, since the mass will better get into all the folds and the handle or leg will be more prominent. In this matter, the main thing is calmness; holding someone in a position will not give the desired result.
If the baby is still very small, then during the process, in order to calm him down, sing a lullaby. You can see options for lullabies in the article: “Lullabies for babies.”
Master class No. 2. Your hands and plaster
To make a realistic plaster hand with your own hands, follow the steps from tutorial No. 2.
You will need:
- gypsum;
- alginate powder;
- container in which the plaster will be mixed;
- a container in which the alginate powder will be mixed;
- water;
- oil;
- stationery knife.
Let's look at the process of creating the plaster hand itself, without touching on the coloring process afterwards. You may not decorate such a hand with anything at all, leaving it looking like part of an ancient Greek sculpture. Or you can paint it in skin color to give the plaster hand maximum realism.
Design options for impressions
Making a cast of the arm and leg is half the battle. It still needs to be beautifully decorated. In addition to making a cast, it also needs to be beautifully designed. There are many design options, because it all depends on your imagination. Here are some design options:
1. In the form of a figurine. To do this, cover the resulting cast with silver or bronze spray paint and place it on the base. Sign and date the base and receive a miniature figurine.
2. Photo frame with a cast. Glue a photo of your child and a cast of a hand and foot into a regular photo frame. In addition to these things, you can put a tag from the maternity hospital, a pacifier and other paraphernalia of the newborn “under the glass”.
3. In the form of a pendant.
Make a hole during making. After the casts of the arms and legs have hardened, thread a beautiful ribbon through this hole and hang it on the wall in the children's room. You can read about decorating a room for a newborn in the article: “Children’s room for babies.” Author of the publication: Zoya Kiseleva
Kits for making 2D and 3D impressions yourself
Recently, a copied souvenir plaster hand has become popular among ordinary people. How to make it yourself is described in detail in the instructions for ready-made modeling kits. This kit is ideal for those who want to try their hand at volumetric casting, but are unable or unwilling to understand the brands of molding compounds and plaster.
The kit will cost more than separately purchased components. But manufacturers focus on the convenience of this configuration. In addition, they provide a quality guarantee on their materials. The set includes a dry hypoallergenic mass for molds; it is easy to prepare by adding water in the required ratio. High-strength model purified gypsum is also available.
The kit for making casts of simple hand or foot impressions includes a reusable plastic molding compound. Before use, it is kneaded, an impression is made and plaster is poured into it. After solidification, the casting is removed. If re-filling is not expected, the mold is kneaded again until soft and stored in a plastic bag.
How to advertise a business
To get started, create an account on Instagram, post a few of your works as examples and set up targeted advertising. You can look for your first clients among young mothers, newlyweds and even dog lovers - the paw print of your beloved pet will please its owner.
To attract attention, you can offer your services in exchange for a post and story to popular bloggers in the region. As offline advertising, you can hand out your business cards at maternity hospitals and the registry office. Try organizing a collaboration with other projects in the gift industry and raffling off a gift certificate.
Hard impression materials
These include gypsum (see) and dentol. Gypsum is used to make impressions in the manufacture of crowns, intermediate parts of bridges, clasps, plate dentures for partial and complete edentia, etc. However, gypsum casts have a number of disadvantages: when removing the cast from the oral cavity, it has to be broken, after which it is not always possible to accurately compare the fragments; there is a danger of aspiration of pieces of plaster, especially in pediatric practice; When a plaster cast is taken, mobile teeth can be removed along with it. All this limits the use of gypsum as a material.
Dentol is a high-quality S. m. based on zinc-oxide eugenol or guaiacol. It is a practically non-shrinking material, does not deform when removed from the oral cavity, and is harmless. Thanks to these properties of dentol, it can be used to take very accurate impressions not only of teeth, but also of soft tissues. Dentol is used to obtain impressions of toothless jaws. A high-quality dental impression can be obtained only on rigid individual impression trays with a small thickness (2-3 mm) of the smear layer. The impression hardens in the oral cavity for 2-5 minutes, after which it is removed. If the paste is reapplied to the surface of a hardened cast, then when it hardens it bonds well with the original layer, which allows for the purpose of correction to make a repeat cast. The impression can be stored for a long time without changing its volume or configuration. Impression material based on zinc oxide eugenol—repin, produced in Czechoslovakia—has been widely used in the USSR.
Elastic impression materials
These include hydrocolloid, alginate, silicone, and thiokol S. m. Hydrocolloid S. m. are elastic compositions based on agar. To give greater strength, fillers are added to the impression mass. When heated, hydrocolloid materials become plastic, and when cooled they again acquire elastic properties. They clearly recreate the surface relief of the prosthetic bed, but due to a number of negative properties (long preparation for use, large shrinkage) they are not widely used. They are used mainly for duplicating models used for the manufacture of clasp dentures.
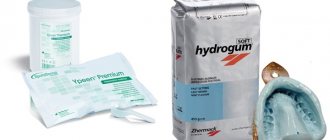
Alginate S. m. are obtained on the basis of sodium alginate. These include algelast, stomalgin, novalgin. Alginate materials have high elasticity, reproduce the surface relief of the prosthetic bed well, and are easy to use. Impressions are made from alginate resins for the manufacture of dentures in cases of partial edentia, in the presence of mobile teeth, etc. The impression is made on a perforated tray, since the impression mass lags behind a regular tray. Alginate molds shrink significantly, so models must be cast no later than 15 minutes later. after receiving the impression. The alginate cast is very easily separated from the model. S. m. based on sodium alginate have become widespread in many countries: elastic is produced in Czechoslovakia, calcine is produced in the GDR, etc.
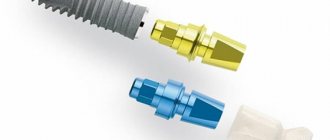
Silicone resins are a liquid polymer that, when mixed with an appropriate catalyst (hardener), turns into elastic rubber. These include sielast PS, sielast 03. Silicone synthetic materials are used in the manufacture of porcelain crowns, solid bridges, clasp, metal-ceramic prostheses, as well as in the creation of lamellar prostheses with complete secondary edentia. They are also used to obtain the so-called. double-layer casts that well reproduce the relief of the tissues of the prosthetic bed. Silicone molds shrink after 3 hours, so the model must be cast no later than this time. Casts from the model are easily removed.
Thiokol S. m. are obtained on the basis of thiocol polymers; they are used in the same cases as silicone S. m. A representative of thiokol S. m. is thio-dent, a practically non-shrinking material. High-quality impressions from thiodent are obtained only with sufficient pressure, so rigid individual trays are used and a small amount of S. m. is taken.
Manufacturing process step by step
- Step one. Prepare everything you need for work. Cut off the bottom of a five-liter bottle. Slide a rubber glove inside and secure it at the top of the neck with a hair tie. Make sure the glove is held securely.
- Step two. Pour plaster into a special bowl. Depending on the size of your glove, determine by eye how much plaster you need. Then add a little water and stir thoroughly. Ideally, the proportion of gypsum to water should be 6:4. After mixing, the gypsum should be similar in consistency to thick sour cream. You can stir the plaster with your hands, kneading it so that there are no lumps. Be sure to wear gloves before stirring, because the plaster hardens quickly and is very drying to the skin. Take care of your hands. You can use a whisk with a mixer or attach the whisk to a screwdriver. If you stir with your hands, remember: the plaster “lives” for ten minutes. So if you spend five minutes stirring it, you only have five minutes left to pour it into the mold.
- Step three. Pour plaster into the glove a little at a time. Check with your hand that the mixture is well distributed over the fingers of the glove. Take the bottle by the neck and shake it well, tapping it on the surface you are working on. Pour more plaster and shake, then add almost to the very top of the glove and shake again.
- Step four. Leave the plaster to dry. It usually takes 10-15 minutes for the plaster to harden, but it will still be better if you pour it in and leave it for a while while you go about your business.
- Step five. Remove the glove from the bottle, take the scissors and carefully cut it. But that is not all. Now the hand needs to be treated.
- Step six. Take a utility knife and carefully cut off the unsightly edges at the base of the plaster brush. You can also use a knife to scrape away any unevenness or roughness. You can use sandpaper instead of a knife. But be careful not to overdo it and grind your hand into dust. If you were unable to avoid air bubbles and there are still cavities on the plaster arm, you can try diluting a little more plaster and carefully covering up the imperfections.
- Step seven. Take acrylic paints. You can choose any color you like, but we still recommend taking white to start with. Cover the surface of the plaster hand with paint and wait for it to dry.
- Step eight. Take napkins with drawings and cut out the pictures you like with which you would like to decorate your plaster hand. Remove the white layer from them, there are usually two of them on napkins. Apply them to the plaster hand where you want, on the paint that is not yet completely dry, so that the picture sticks. Repeat as many times as you wish.
- Step nine. Cover your hand with clear acrylic varnish and leave to dry.
- Step ten. After completing all the previous nine steps, your product is ready.
Master class No. 1. Plaster and rubber glove
You will need:
- gypsum;
- container in which the plaster will be mixed;
- water;
- thick rubber glove;
- a five-liter water bottle or any other stand on which you can attach the glove;
- tight hair tie;
- stationery knife;
- scissors;
- acrylic paints;
- napkins with beautiful designs;
- acrylic clear varnish.
Now let's get to work! Let's figure out how to make a hand from plaster using a rubber glove.
What is “alginate powder for impressions”
The use of this powder can most often be seen in dentistry. Using alginate, dentists make impressions to model dental prostheses, as well as to clarify the patient’s bite.
The powder sets quickly. Its “lifetime” is about fifteen minutes. So from the moment the water touches the powder, you don't have much time to stir it and then have time to stick your hand in there to create an impression.
Alginate holds its shape well, so it is often used for making impressions not only in dentistry. You can dip your hand into the alginate only after you have mixed the substance with water until it becomes thick sour cream. It will turn pink and change to yellow as it hardens.
We create casts of arms and legs ourselves using alginate gel and plaster
and higher, depending on the baguette option
Composition design:
- photo collage and decorative elements - 100 rubles.
- decoration for a frame without glass - 100-200 rubles.
The total cost of the composition is 600-700 rubles.
Retail price
The price of a 30x40 format composition with two children’s casts is 2,000-5,000 rubles.
As a result, the income from one composition is 1300 - 3500 rubles.
In practice, for a city with a population of 150 thousand people, the average number of orders per month is 20 pieces, i.e. net profit is about 30 -35,000 rubles. (assuming you run your business from home). Return on investment: 1.5 -2 months