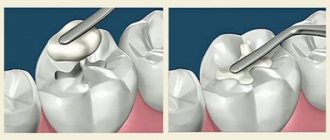
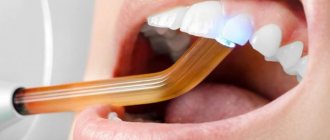
After installing a filling, artistic restoration with composite materials, or professional cleaning, teeth must be polished.
The tasks in each case are different, but the meaning is the same: to make the surface as smooth as possible, to remove microcracks, the smallest protrusions and grooves. The smoother the surface, the fewer bacteria there are, which means the lower the risk of infections and inflammation in the oral cavity.
- When used:
polishing restorations and fillings; after hygiene - Treatment period:
as needed - Type of anesthesia:
not required - Procedure time:
up to 40 minutes - Age restrictions:
from 18 years old (in our clinic)
Goals of the procedure
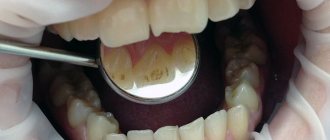
Composite restorations are polished to prevent the accumulation of bacteria in small cracks, and fillings are polished to smooth the transition between it and dentin and correct microdefects.
Grinding and polishing the enamel is the final stage of hygienic teeth cleaning and plaque removal. After the teeth are freed from deposits, their surface becomes rough, and microcracks appear in the dentin. This is a guarantee that plaque will form again and quite quickly. Polishing your teeth after brushing removes minor defects and remaining mineral deposits, preventing the formation of stone.
Techniques for finishing composite restorations
Victor Shcherbakov
dentist, aesthetic dentistry clinic Royal-Dent (Moscow)
Direct restorations are usually perceived as a method that does not have the greatest aesthetic potential, since in the vast majority of cases, work made from composites has disadvantages such as rapid loss of shine, the presence of visible optical boundaries and non-ideal surface tooth-restoration transitions.
The quality of the gloss of a composite restoration can be maintained at a high level by observing basic rules of personal hygiene and periodically visiting the dentist for additional polishing. Optical inhomogeneity of the restoration can be avoided by strictly adhering to the recommended rules for working with color, which are widely described in various educational publications. In addition, for a more accurate assessment of the optical structure of teeth, there are various modern technological devices: polarizing filters, spectrophotometers, etc. However, creating uniform topographic boundaries without noticeable surface transitions of the tooth into the restoration turns out to be a much more difficult problem than all the others.
The difficulties of creating invisible topographic transitions are especially pronounced in those clinical cases where fragmentary restoration of part of the tooth is required. At the same time, when making a restoration, you need to try to reproduce as accurately as possible the natural microrelief of the enamel surface, to prevent either an excess of material or its deficiency at the transition boundary. To avoid such difficulties, many doctors prefer to cover the entire vestibular surface with a layer of composite or switch to indirect restoration techniques, such as ceramic veneers.
The problem of the presence of noticeable topographic boundaries can only be solved at the stage of finishing the restoration. This procedure is extremely important and requires great care from the doctor and the correct algorithm for performing manipulations with various grinding tools. Unfortunately, this aspect of direct composite restoration is not described in sufficient detail in the educational literature. This is partly due to the fact that there are many different polishing systems from different manufacturers on the market, and each of them has its own characteristics and nuances of application.
This article describes a clinical case of minimally invasive restoration of two central incisors with a detailed description of the modified finishing protocol.
Initial clinical situation: class 4 defects on two central incisors. From the anamnesis, it became clear that these defects are of an abfraction nature and were formed due to the fact that the patient had a bad habit of chewing a pencil for a long time (Fig. 1)
.
Rice. 1. Initial clinical situation. Class 4 defects on two central incisors.
The complexity of this clinical case is that the teeth have an almost perfectly smooth surface with minimal microrelief. Creating imperceptible transitions in such conditions is a much more complex task than reproducing the relief on teeth with a pronounced surface texture, where it can be masked by the pattern of perikymatia and other enamel formations (Fig. 2).
Rice. 2. The teeth have a surface with minimal microrelief.
The work was carried out using the silicone key technique. A direct mock-up was made, all occlusal and articulation tests were performed, and the silicone index was removed (Fig. 3).
Rice. 3. The work was carried out using the silicone key technique.
View of teeth after isolation and preparation. The volume of hard tissue preparation was kept to a minimum and was limited to only 0.3 mm around the perimeter of the defect with a small fold on the vestibular surface (Fig. 4).
Rice. 4. View of teeth after isolation and preparation.
The lower third of the two central incisors were sandblasted with 27 µm aluminum oxide powder. This technique allows you to increase the specific surface area of the tooth by 5-6 times, which has a very positive effect on the strength of the adhesive connection (Fig. 5).
Rice. 5. The teeth have been sandblasted.
Reproduction of palatal walls from a transparent shade of composite (Fig. 6)
.
Rice. 6. Reproduction of the palatal walls from a transparent composite shade.
View of teeth after completion of application and adaptation of composite layers. It is necessary to try to reproduce the tooth tissue so that after modeling the tooth shape is as close as possible to the one required, without excess material. To final align the contours, it is very convenient to use a flat artistic brush (Fig. 7)
.
Rice. 7. View of teeth after completion of application and adaptation of composite layers.
For a more clear visualization of the contours and edges of the tooth, it is convenient to use a pencil (Fig. 8).
Rice. 8. To visualize the contours and edges of the tooth, it is convenient to use a pencil.
According to the indicated pattern, the surface is carefully treated with a finishing diamond bur (with a red stripe). It is necessary to avoid contact of bur with enamel (Fig. 9)
.
Rice. 9. Finishing with a diamond bur (with a red stripe).
Treatment of the composite surface with Enhance silicone heads (available analogues: One Gloss, Shofu; Identoflex Composite Polishers, yellow forms, Kerr). The intensity of abrasion of these tools can be changed by dosing pressure on the tip during operation. Medium abrasive finishes have a very moderate impact: their grinding activity is enough to remove layers of the composite, but they are completely harmless to the enamel. It is with the help of these finishing tools that the level of the material in relation to the tooth tissue is achieved. Enhance heads must be operated without water cooling, otherwise visual inspection becomes impossible. Accordingly, care should be taken to operate at low speeds to prevent overheating of the tooth. After using the Enhance heads, the composite surface should have a slight shine and uniform cross-striations (Fig. 10).
Rice. 10. Surface treatment with Enhance heads.
Treatment of the composite surface with PoGo polishers (available analogues: Identoflex Composite Polishers, gray forms, Kerr). These polishing heads give the material texture a perfect shape and a primary dry shine. Given the extremely low degree of abrasion of these instruments, the density of contact between their surface and tooth tissue is much higher than that of finishers, so PoGo heads should be used without pressure, intermittent movements and with water cooling (Fig. 11).
Rice. 11. Surface treatment with PoGo polishers.
Following PoGo, this finishing protocol suggests the use of a dental felt floss brush for a straight handpiece. These brushes act as an intermediate link before final polishing using pastes (Fig. 12).
Rice. 12. Treatment with a dental felt floss brush.
Polishing the composite using Prisma Glossextrafine paste (analogue: SHINYC, Enamelplus). The pastes give the composite surface a sparkling dry shine (Fig. 13).
Rice. 13. Polishing with Prisma Glossextrafine paste.
View a few days after finishing. After correctly and carefully following the finishing protocol, any boundaries (both optical and topographical) were no longer noticeable (Fig. 14
—
19).
Rice. 14. Fig. 15. Fig. 16. Fig. 17. Fig. 18. Fig. 19.
This clinical case demonstrates that the correct finishing protocol is of great importance for the esthetic success of restorative treatment. A very important condition for the correct use of finishes and polishers is clear visual control of the surface of the composite. It is necessary to periodically look at the tooth from lateral angles and watch how the light plays on the emerging relief of the composite material. It is necessary to achieve such an effect that the glare from the dental lamp, falling on the boundary of the connection between the tooth and the composite, is not distorted, but goes smoothly, repeating the same outlines as on the enamel. It is necessary to change the direction of the light and the position of the patient's head in order to be able to monitor the play of light on different areas of the tooth. Also a very desirable addition during finishing is the use of magnification (binocular loupes or an operating microscope).
Are there any contraindications
There are no contraindications for polishing teeth, but procedures that precede this do have them.
For ultrasonic cleaning:
- presence of a pacemaker;
- treatment with immunosuppressants and corticosteroids;
- recent eye surgery;
- epilepsy;
- severe form of diabetes.
For AirFlow:
- taking medications for salt balance;
- hepatitis;
- AIDS;
- sodium-free diet;
- lung diseases, asthma.
In case of infections, diseases of the upper respiratory tract, exacerbation of general conditions, or the presence of ulcers in the mouth, it is worth postponing resurfacing until the condition improves.
Main indications and contraindications for the procedure
The main indication for performing the process is the roughness of the enamel. It can appear due to the individual characteristics of the body, as well as after professional cleaning.
At the first free consultation, the dentist will check the condition of the oral cavity for the presence of major contraindications.
These include:
- High sensitivity and severe bleeding of the gums.
- Aggravated periodontitis.
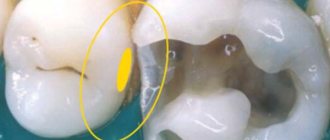
- Caries, especially with deep damage to the tooth tissue.
- Individual increased sensitivity of enamel.
You should not carry out polishing even if there are pockets of inflammation in the oral cavity. In this case, it will be necessary to first carry out treatment and eliminate them.
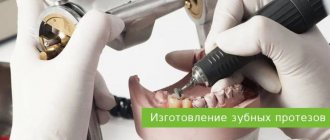
What is used
After removing plaque with ultrasound or an air-abrasive device (AirFlow), the dentist begins grinding the teeth.
For this we use:
- Special polishing attachments.
Rubber cups are filled with abrasive paste and all surfaces are thoroughly treated. To treat the tooth crown after the cup, brushes are used. - Strips.
To polish between the teeth, dental tapes (strips) are used. They do this very carefully, trying not to damage the gums. - Abrasive pastes.
To enhance the abrasive effect, use: - Zircon:
an abrasive that perfectly removes age spots and yellowness in smokers. - Silicon dioxide:
suitable for post-scaling polishing, fillings and artistic restorations - Aluminum hydroxide:
depending on particle size, used for both plaque removal and final polishing - Titanium dioxide:
polishes enamel and closes tubules in dentin