Characteristics of the method
The use of devices that allow magnification of images of the operating area provides doctors with significant advantages in medicine.
It becomes possible to assess the condition of each tooth and perform complex manipulations, controlling every movement. Key factors that improve the quality of dental treatment and prosthetics: multiple magnification , good lighting , accurate and convenient positioning of the microscope.
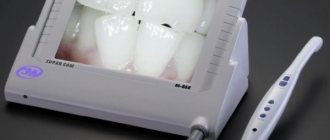
In dental treatment, special dental microscopes are used - electronic optical devices that can magnify images 30 times or more. The microscope is brought to the surgical field using a pantograph, which in turn is attached in various ways: floor (bed), wall (brackets), ceiling; Thanks to the mechanism, the microscope easily takes the exact position above the tooth and is fixed in it. The microscope is equipped with a digital camera connection, which can be used to take photographs and record videos. An image of the treatment process is displayed on the monitor so that the assistant, whose presence is required, can navigate the doctor’s actions. Some devices are equipped with a monocular or binocular tube for an assistant to monitor the progress of treatment.
During treatment using a microscope, the patient is in a chair in the “lying” position, and a microscope lens is installed over the tooth being treated. The doctor sits behind the patient's head or to his right and conducts treatment through eyepieces. The assistant gives the dentist the necessary instruments. For the doctor who conducts treatment under a microscope, a work chair with special armrests and lumbar support is provided - this is necessary so that during long procedures the dentist does not get tired of sitting and there is no hand trembling.
What is a dental microscope
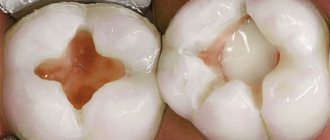
A dental microscope is a device that magnifies the image of a tooth by 40 times. A tooth is a very small organ with thin, winding canals. The boundary between healthy areas and caries-affected areas is so blurred that it is difficult to distinguish with the normal eye. Thus, the dentist carries out treatment only by relying on the reflection in the dental mirror. A dental microscope expands the “view” and improves the visibility of the internal structure of the tooth. This allows you to remove only affected tissue without touching living tissue, and reduces the risk of missing a carious cavity or an unclean canal. The microscope makes it possible to bring the treatment process to perfection, eliminating all the shortcomings and “blind spots”.
Benefits of dental treatment under a microscope
Dental treatment using a microscope has the following advantages:
- The ability to see details hidden to the naked eye;
- Quick and accurate detection of enamel fractures and cracks, the first signs of caries;
- Minimizing damage to healthy tissue when preparing carious cavities;
- Enlarging the local area of the surgical field allows one to observe not only the oral cavity, but also to examine an individual tooth in detail;
- Improved lighting. Light is locally directed to the location of magnification. The backlight can be halogen, LED or xenon. Each type has its own advantages when performing different tasks;
- Better visibility of root canals during endodontic treatment, reducing the likelihood of perforation and facilitating unfilling and removal of broken instruments;
- Detailed visualization of anatomical structures during implant treatment;
- Monitoring and assessment of the condition of soft tissues;
- Detection of areas of loose filling during diagnostics and restorations;
- The ability to photograph and videotape the treatment without interrupting it. These materials are provided to the patient for his better understanding of the problem with which he consulted the doctor and the results of treatment;
- Detailed recording of diagnostic results and treatment process;
- Photo and video materials obtained during treatment can be used not only to achieve understanding between the doctor and the patient, but also for consultations with colleagues, presentations at scientific conferences, teaching students, and participation in research.
Indications and contraindications
This service is necessary in the following cases:
- inflammation of the pulp that occurs
- due to the defeat of a pathogenic
- microflora;
- trauma to the tooth and jaw;
- deep caries damage
- long-term lack of treatment;
- periodontitis is extensive inflammation of the root membrane.
Contraindications include:
- pregnancy;
- inflammatory processes in the oral cavity, including stomatitis;
- leukemia;
- psychical deviations;
- cardiovascular diseases;
- infectious hepatitis.
The price of the service depends on the patient’s condition and the extent of damage to the tissues of the pulp, dentin, roots and their membranes. You will receive accurate information during a face-to-face consultation with a doctor. Don't put off visiting the dentist; the longer you wait, the more expensive the treatment will be.
Canal treatment under a microscope
The dental microscope is used in various fields of dentistry, but its use is most effective in endodontic treatment - treatment of tooth cavities and root canals. The work of a dental therapist during endodontic treatment requires increased care, skill and “flair,” therefore the use of a dental microscope increases the success of endodontic treatment several times. Below is a short demonstration of the root canal treatment process under a microscope:
A dental microscope can increase the likelihood of success when:
- Searching for the mouths of canals, including additional and fourth ones;
- Detection of channel branches;
- Detection of pulp residues or carious lesions inside the canals;
- When identifying voids formed during canal filling (the latest techniques, such as injection gutta-percha, when used correctly, eliminate the formation of voids);
- When cracks are detected in the root canals that are not visible on x-rays.
Below is a list of dental operations, the implementation of which has an average and low percentage of successful prognosis with conventional treatment, but when using a microscope, the success rate increases:
- Working with the uncovered root tip;
- Unsealing and re-treatment of poorly treated canals;
- Removal of intracanal pins;
- Removing from the canal fragments of instruments broken during previous treatment;
- Closing perforations. Using the usual method, it is impossible to accurately localize the site of damage to the root canal, and even more so, to bring the instrument to it;
- Treatment of cysts and granulomas. Previously, when cysts and granulomas occurred, teeth had to be removed. Later, methods of therapeutic and surgical treatment appeared, and finally today, thanks to the use of magnifying devices, dentists are able to cure teeth that were previously considered hopeless.
The microscope allows you to reduce the number of medical errors and complications that often occur during root canal treatment in the usual way, “blindly”.
All branches and bends of the main and additional root canals are visible through the microscope, cleaning canals and carious cavities, removing old filling material and filling with new material is greatly facilitated, and objective control of its adherence to the canal walls appears. All this increases the quality of the dentist’s work, the service life of the filled canal and the restored tooth.
Minimally invasive access to canals for primary treatment.
Today, one of the main trends in dentistry is caring for tooth tissue. Basically, their longevity depends on this. If previously there was a need for root canal treatment, the doctor often had to remove not only the tissue affected by caries. A large amount of healthy, innocent tissue was drilled out simply so that the doctor could better see the “insides” of the tooth. As a result, after root canal treatment, the tooth had to be restored with a crown, and sometimes with pins. In general, the result was a classic scheme: we treat one thing and cripple another.
With the introduction of microscopes into canal treatment practice, approaches are changing. The photo on the left shows access to the channels, designed for ease of operation without magnification. On the right is access sufficient to work in the channels with a microscope. As they say, feel the difference!
In the photoset below you can see the progress of treatment of exacerbation of chronic pulpitis in the upper canine. The story is banal: a tooth under an old filling began to worry - it ached from the cold and on its own, in general, an absolutely typical problem. The treatment is also quite banal - “removal of the nerve”, or, in dental language, depulpation.
Why is there a microscope here? He allowed the treatment to be carried out through a tiny hole, just over 1 mm in diameter, made through an old filling. At the same time, through this small hole, virtually the entire tooth canal was visually visible, which means it was quite easy to control the quality of its cleaning. This factor determines the quality of the entire intervention (more on this below). After all, remnants and fragments of the “nerve” that are not removed from the canal lead to the appearance of granulomas and cysts after some time. That. Without loss of quality, treatment was carried out, which did not require drilling out a single extra square mm of healthy tissue. After treatment, the tooth was closed with a regular filling, no pins, no crowns. The most gentle approach to tooth tissue in action.
Aesthetic restorations using a microscope
What criteria must the restoration meet:
The restoration, like a filling, must restore occlusion, not interfere with the natural closure of teeth, repeat the anatomical shape of the tooth in detail, and be reliable enough for the tooth to perform the function of biting or grinding food. Reliability is achieved through the complete implementation of all steps when placing a filling. Defects can occur when cleaning the surfaces of a prepared tooth. Using a microscope, before and after etching, the dentist is able to visually verify the absence of tissue particles or foreign materials. This undoubtedly improves the prognosis of treatment;
The restoration must match the natural color of the teeth and be invisible. Not only the color, but also other optical properties of the enamel (opalescence, transparency) must be reproduced, which is obviously easier to do if the work area is increased several times;
The junction of the restoration with the biological tissue of the tooth. A large gap at the junction will concentrate stress, become a place for the accumulation of bacteria and plaque and the development of caries, i.e. The more accurately the dentist “attaches” the edge of the filling to the tooth, the longer it will last. In this context, a microscope is an ideal instrument for monitoring the size of the joint. Similar logic is suitable for installing ceramic inlays or crowns.
When restoring the form and function of teeth through restoration, it is important to consider as many details as possible. This is possible by increasing the restoration area. With traditional treatment, the dentist's view is limited to what is reflected in the dental mirror or what he sees with his eyes. The use of a microscope allows you to expand the capabilities of the dentist and improve the quality of the filling being installed.
The use of a microscope in surgical dentistry
The microscope is also effective during surgical operations.
The use of a dental microscope makes it possible to make surgery minimally invasive, since it becomes possible to use microinstruments specially designed for microscopic dentistry, which are significantly smaller in size compared to traditional ones, and therefore cause less damage to oral tissue. Patients tolerate both the operation itself and the postoperative period more easily.
Features of working with a microscope
Dental treatment under a microscope has its own characteristics that must be taken into account when working:
- To work with a dental microscope, specialized training of the doctor and assistant is required;
- Adaptation of the dentist’s eyes to the device lasts about six months; during this period, the dentist may experience pain in the eyes when working with the microscope for a long time.
- The assistant must accurately respond to the doctor’s requests and place the necessary instruments in his hand.
- Conventional dental instruments are not suitable for treatment under a microscope, since their handle or the operator's hand may obscure the field of view; requires the purchase of new tools.
- The disadvantage of a microscope in root canal treatment is its ability to “see” only what is directly in the line of sight; when the canal is bent, the surface becomes inaccessible for viewing. In reality, in 90% of cases, the doctor’s gaze reaches almost to the apical part of the tooth;
- The patient is required to remain as still as possible.
- A dental microscope is an expensive device. This circumstance, as well as the need for special training of the dentist, increases the cost of treatment.
More and more patients understand that dental treatment under a microscope is better and more effective, so they are looking for clinics that have the necessary equipment and specialists. The use of a dental microscope in some cases is the only way to conduct accurate diagnosis and treatment and provide the patient with high-quality dental care.
Operating microscope in endodontics: nuances of effective ergonomics
A modern dental practice cannot be imagined without an operating microscope. The first mention of the use of a microscope in dentistry dates back to 1977, but the main popularizer and developer of ergonomic methods in root canal treatment using visualization techniques and specialized instruments was Garry B. Carr. In the early 90s, he proposed a modified model of an operating microscope with switching magnification levels, angular optics and the ability for an assistant to interact with a doctor.
Advantages of using intraoperative microscopy technique:
- Focused magnification and illumination of the surgical field thanks to static fixation of the microscope
- Visualization of all areas of the tooth thanks to the ability to switch microscope magnification levels
- Ergonomically correct and comfortable position of the doctor on the work chair
Preparing for work
The effectiveness and quality of treatment depends to a large extent on both the doctor’s comfortable state of health during work and the time the patient spends in the dental chair. The duration of the procedure, naturally, depends on the quality of the prepared workplace and the location of the instruments at arm's length.
When working with a microscope, the dentist’s hands, as expected, should be placed on the armrests of the microsurgical chair, which allows the doctor to steadily perform movements with only the hands and stably fix the instruments during various manipulations.
We strongly recommend that you equip the assistant unit with additional sockets for aspirators. This will allow you not to change the aspirator nozzles depending on the stage of treatment. In this case, after the stage of forming access to the tooth cavity, during which it is necessary to use a vacuum cleaner of a larger diameter, and then at the stage of root canal irrigation, where it is necessary to use a vacuum cleaner of a smaller diameter, the doctor’s assistant will be able to quickly switch to an already prepared nozzle of the required diameter.
During treatment using a microscope, an orthopedic mattress and pillow, additionally placed on the patient’s chair, provide him with a comfortable stay at the reception and allow him to avoid unnecessary distraction of the doctor from the surgical field while turning the patient’s head and searching for a more optimal location.
Taking into account the duration of endodontic treatment and the maximum muscle tension in the patient’s mouth, a so-called bite gum or spacer installed on the dentition of the upper and lower jaws allows the patient to fix the jaw in one position for a long time.
The large focal length of the operating microscope (300, 350 and 400 mm) and the possibility of a degree of minimal magnification make it possible to perform simple manipulations, such as local anesthesia, measuring the working length of the root canal, which usually do not require the use of a microscope.
It should be mentioned that some practicing clinicians claim that changing magnification devices during the operation makes it easier for them to perform simple procedures.
However, frequent changes of magnification devices (that is, changing the operating microscope to binocular loupes) can lengthen and even complicate the treatment process.
Therefore, in order to avoid replacement of magnifying optics and a more balanced and ergonomically correct positioning of the doctor on the microsurgical chair in terms of back posture and muscle comfort, the stages of anesthesia and installation of rubber isolation, i.e. rubber dam are carried out under minimal magnification at a large focal length.
Before seeing a patient, it is necessary to develop an algorithm for interaction between the doctor and the assistant. In particular, prepare in advance a clamp threaded through the hole in the rubber curtain. When the doctor’s call sign (conditioned hand movement) is given, the assistant brings forceps with a clamp threaded through a rubber curtain into the field of view of the operating microscope
In cases where endodontic treatment is planned in the area of the anterior group of teeth, we recommend isolating a segment of the dentition, which will allow us not to lose the orientation of the inclination of the tooth when creating access to the cavity. In this case, the clamp arc from the rubber dam will not prevent the movement of the index and thumb during root canal treatment, and also, if necessary, apply pressure with the fingers on the filling material during retreatment.
It is also worth noting that isolating a segment of teeth and using what we call earless clamps allows us to avoid difficulties when installing a matrix and wedge in a situation where it is necessary to form a contact point during the final restoration of a tooth.
Formation of access and search for root canal orifices
Unfortunately, in the vast majority of scientific and practical recommendations, the main emphasis of ergonomics is the “service” of the doctor by his assistant. This circumstance does not always satisfy the requirements for coordinated and effective work of the treating tandem. Taking into account the individuality of each specific clinical case, protocols and algorithms during treatment may vary.
Under these conditions, an important task for the assistant is the ability to anticipate the doctor’s action, provide the necessary instrument to the surgical field and evacuate the fluid using an aspirator.
The assistant's eyepieces on the operating microscope allow him not only to be in the correct ergonomic position at the appointment, but also, by means of visualization, through the microscope eyepieces, to control the work process from the beginning of anesthesia to the final restoration of the tooth.
Often, when creating an access and searching for an additional mouth of the root canal, a loss of visibility occurs due to the coolant of the drilling machine getting on the mirror, as well as dentine filings filling the tooth cavity during preparation.
A fundamentally important point in the operation of a tandem using an operating microscope is the constancy of direct (immediate) and indirect (through a mirror) views of the surgical field.
Thanks to additional eyepieces, the assistant is able to directly monitor the treatment process. If visualization is lost, using a Stropko adapter mounted on an air gun, the assistant removes obstructing fluid residues from the mirror and dentinal filings from the tooth cavity.
To ensure accelerated evacuation of fluid from the surgical field, it is recommended to use a surgical aspirator with a 45-degree tilt of the working part, installed in a dental vacuum cleaner adapter with a 90-degree bend.
This bend allows you to avoid unnecessary movement of the assistant’s hand when removing it from the stand and instantly install it in the surgical field in order to stably fix it with your hand in order to eliminate tremor. This is achieved due to a comfortable position of the hand and minimal muscle activity.
It is worth taking into account the fact that at the stage of forming access from the level of the tooth cusps to the mouth of the root canal, the sharpness of the image will depend on the focal length, since as we move deeper into the tooth cavity, the detailing of the mouth part will be worse in quality than the coronal part of the tooth. As a rule, in this situation, the doctor resorts to tilting the microscope with the brow ridges to a level lower than the patient, so as not to lose the sharpness of the image. This, in turn, over the course of long-term practice can lead to noticeable disturbances in the doctor’s posture. To eliminate this phenomenon, we recommend using the pedal of the dental unit more often to raise the patient to the required level, and accordingly, so as not to lose the sharpness of the view. The pedal control allows you to adjust the patient's position relative to the microscope.
Endodontic files are usually placed in a special sponge (Clean stand). It is worth noting that each subsequent file entered into the blind zone must be installed separately from all the others so that the doctor can tactilely identify the desired file in the sequence of this algorithm.
In order to save time, at the stage of determining the working length, a metal probe is attached to the apex locator clip, the working part of which is represented by a V-shaped recess.
Unlike using the thumb forefinger and middle finger to form a tripod to hold and extend the metal clip on the working part of the electronic length meter, the metal feeler allows you to immediately determine the working length using the V-shaped depression without using the muscles of the hand.
To reduce the frequency of transfer of the measuring ruler between the doctor and the assistant, it is possible to use a ruler located on the handle of the dental mirror.
A graduated recess on the handle of the dental mirror allows the doctor to read the working length of the canal on a file or record the length value at the stage of fitting the gutta-percha pin, without looking up from the eyepieces of the operating microscope.
To fit the gutta-percha pin in the root canal and fix the reference value of the working length, it is more convenient to use tweezers with a Castroviejo lock. This will allow one press of the index finger and thumb to open the jaws of the instrument or fix the pin at the level of the tubercle or cutting edge.
If the length of the gutta-percha pin exceeds the reference value, its tip must be shortened with Castroviejo microsurgical scissors, the working part of which, that is, their activation, is carried out by the thumb and forefinger.
Compared to traditional ones, microsurgical scissors are easier to put into the doctor’s hand; they are optimized for preparing the pin, since they do not have rings in their design that are necessary to hold the instrument with three fingers.
Before preparing the canal for filling, to speed up drying, a microcannula is installed on one of the aspirators, which allows you to quickly remove liquid and reduce time costs when using paper points.
Surgical endodontics
The problem of hemostasis remains very relevant in surgical endodontics. Although there are many chemical hemostatic agents available today, they are unfortunately less effective than having an assistant monitor the dryness of the surgical site through microscope eyepieces.
Considering that the likelihood of postoperative complications decreases depending on the speed of the surgical intervention, it is recommended to carry out treatment with two assistants.
One of the assistants controls hemostasis through visualization of the oculars using microsurgical aspirators, the other carries out the transfer of instruments.
Of course, the use of an operating microscope makes it possible to treat patients at a newer, higher-quality and high-tech level.
However, this technique requires the use of specialized instruments, which will optimize the dental approach and increase the effectiveness of treatment using magnification.
Instrumentation and filling of root canals
The main problems affecting the duration of the procedure for instrumental sanitation and root canal filling are: delivery of root needles to the surgical field, transfer of the endodontic ruler from the assistant to the doctor when measuring the working length and fitting of the gutta-percha pin, impaired hand coordination when setting the reference value with a rubber stopper on file using the apex locator clip.
In order to prevent fatigue during instrumentation of the root canal, as well as tension in the shoulder muscles, you should place your hands on the armrests of the microsurgical chair.
To do this, the patient’s head should be located at the level of the abdomen, and in a situation where it is necessary to apply more pressure to the root needle, in particular when re-treating canals, in order to avoid tearing the hand off the armrests of the chair, it is permissible to turn the head towards the anatomical location of the tooth and, accordingly, turn the microscope tube (MORA interface) so as not to lose further overview of the surgical field.
This positioning of the patient's head is possible when using a focal length of 300 mm.
Summary
The interaction of members of the treatment team, ergonomics and comfortable working conditions are a prerequisite for providing effective dental care. The quality of the treatment depends on the doctor’s comfortable state of health during work and the time the patient spends in the dental chair.
So, for a truly effective process, we recommend paying attention to the following points:
- When working with a microscope, the dentist’s hands should rest on the armrests of the microsurgical chair
- The assistant unit must be equipped with additional sockets for aspirators
- The patient must be placed on an orthopedic mattress and pillow
- It is important to secure the patient’s jaw with a bite gum or spacer
- Use the pedal of the dental unit more often to raise the patient to the required level, so as not to lose the sharpness of the view.
Prepared based on the materials of the article by Ivan Vyuchnov and Anna Savoskina “Operating microscope in endodontics. Nuances of effective ergonomics. View of the dentist and assistant."
Choose a microscope
Cost of dental treatment under a microscope
The concept of the cost of dental treatment under a microscope, in most cases, does not make sense, because... There is a dental service that has a set price, it can be performed either with a microscope or without a microscope. In most cases, the cost of the service itself increases, this is due to two factors - depreciation of the microscope itself (the cost starts from 30,000 USD) and the large labor costs of the doctor.
However, the increase in cost will be minimal, and potentially, when using a microscope, the patient receives treatment at a qualitatively higher level, the result of which can be used longer; if you want, the return on investment when treating teeth using a microscope will be higher .