Lip piercing or labial piercing is a piercing of the lower or upper part of it for installation in the formed hole of the jewelry. Experts consider this type of puncture to be one of the safest and simplest, since there is a low concentration of nerve nodes and large blood vessels in the lips.
Recently, lip piercing has quickly become popular among youth circles and is considered very fashionable. Both the upper and lower lips, as well as the skin above and below them, are pierced.
Vertical piercing
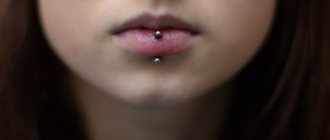
The most popular type of lip piercing still belongs to vertical lip piercing, as it is a practically safe and almost painless procedure. Traditionally, the lip is pierced exactly in the center (from its lower border to the upper point in the center). If everything is done correctly, this piercing looks great and heals quickly.
For this type of puncture, the best decoration is a labret. Here you need to be extremely careful and scrupulous in choosing decoration. Keep in mind that the length of the bar is determined depending on the thickness of the lips after complete healing of the wound.
This is necessary to avoid mistakes when choosing the size of the jewelry. After all, if the bar turns out to be too short, then this threatens the ball growing into the lip area, and a labret that is too long will constantly hit the teeth, causing irreparable damage to their enamel.
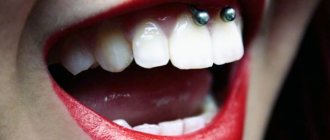
Jewelry in the form of rings is also perfect for this type of piercing. The main task is their correct placement. The piercing must be done so that the jewelry is between the teeth.
How is the procedure performed?
Algorithm for the procedure:
- The first step is to sterilize all instruments and jewelry.
- The oral cavity and frenulum are sanitized with an antiseptic.
- Anesthesia is used.
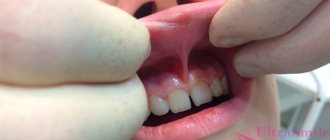
- The master pinches the upper lip with forceps and pulls it upward.
- A disposable needle is used to puncture the frenulum.
- Without removing the needle, insert the decoration.
- The final sanitation of the oral cavity and puncture site is carried out.
With proper care of the wound, it heals quickly without complications.
Only 1 puncture can be performed in one session. If the master made a mistake in choosing the place for the piercing or inserted the catheter unsuccessfully, then the next time the frenulum can be pierced only after its complete restoration.
You can do the piercing yourself. The algorithm for piercing the frenulum under the upper lip is similar to the salon procedure. To perform this, you need to create conditions that will meet sanitary standards: treat instruments with an antiseptic, wear sterile gloves and sanitize the oral cavity.
Horizontal piercing
Horizontal labial piercing is not very popular among beginners; as a rule, it is done by real piercing connoisseurs. Horizontal piercing initially involves a deep puncture, which is performed parallel to the lip. It is usually done on the lower lip from left to right. A labret with 2 balls, one of which is removable, is suitable as a decoration.
Also, not only the labial parts of the face are pierced, but also the skin above or below them. There are several varieties of such piercings: Dahlia, Snakebite, Monroe, Madonna, and Medusa.
Possible complications and consequences
Piercings under the upper lip often heal without complications.
Rarely develop consequences:
- Infection gets into the wound, which leads to suppuration, swelling, and pain at the puncture site.
- Displacement of the earring, its omission due to incorrectly performed piercing.
- Rejection of the material from which the jewelry is made, allergy.
- Damage to tooth enamel, chips.
- Rupture of the frenulum when it is initially thin.
Proper care of the puncture site and avoiding piercing if there are contraindications will help to avoid the development of complications. If after putting on the earring there is discomfort, the frenulum is swollen or bleeding heavily, the jewelry should be removed. After removing the earring, the frenulum heals within a few days without any consequences. The oral mucosa is completely restored after 1.5-2 weeks.
Piercing above and below the lip
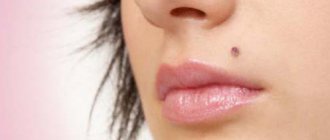
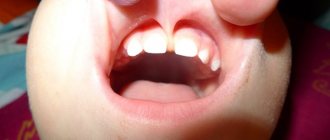
Madonna and Monroe are very popular types of piercings above the upper lip, when the decoration in the form of a pebble or ball resembles the “spot” (mole) of the famous actress Marilyn Monroe. The only difference is that Madonna is always pierced on the right, and Monroe is only pierced on the left above the upper lip.
This piercing is done in one minute and is almost painless. This is all because the tissue at the puncture site is very thin.
Two punctures made on both sides like flies (moles) above the upper lip are called Dahlia.
But similar double punctures made under the lower lip are called a little mysteriously and at the same time frighteningly - Snake Bite.
Jellyfish is a so-called groove piercing that simulates a tear in the mouth.
Before getting a lip piercing, seriously weigh all the pros and cons of this event.
You should know that lip piercing can be accompanied by very unpleasant consequences:
- Exacerbation of chronic diseases, one way or another related to teeth.
- The occurrence of cracks in tooth enamel.
- Redness, inflammation and bleeding of the gums.
- The front teeth begin to crumble and break.
Such troubles most often occur in people under twenty-five years of age.
Features of the puncture site, pros and cons
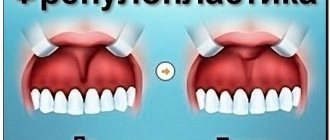
Piercing under the upper lip is invisible to others. When the mouth is closed, the frenulum is not visible. Therefore, the “Smile” piercing technique is suitable for people who follow a dress code at work, where wearing provocative jewelry is prohibited.
Other benefits of piercing:
- ease of replacing earrings;
- rapid restoration of the mucous membrane after a puncture;
- You can remove the jewelry, after which the hole will heal without a trace in 2-3 weeks.
Small earrings are usually inserted into the hole, which, when worn, do not interfere with conversation, eating, or oral hygiene. Jewelry for piercing under the upper lip is chosen in the shape of a horseshoe, half ring, or micro banana.
Cons of piercing:
- there is a possibility of complications developing;
- constant feeling of the presence of a foreign object in the mouth;
- Possible damage to tooth enamel.
Who should not get a puncture?
Unfortunately, there is also a certain circle of people for whom lip piercing is generally contraindicated.
1. Firstly, these are teenagers under the age of eighteen. 2. Also, people who have poor blood clotting are diabetics.
However, a temporary obstacle to piercing can be a period of exacerbation of any chronic disease and even a banal acute respiratory infection, as well as elevated temperature.
If you are still determined to pierce your lip, contact a specialist in a tattoo parlor. Everything will happen there quickly, efficiently and in sterile conditions. It is advisable to perform this procedure when piercing the navel - it is safer.
But if you decide to do the piercing yourself, go to the pharmacy and buy: cotton wool, sterile gloves, alcohol, meramistin solution, an IV system, antibiotic ointment.
Do I need to rotate the earring while the piercing is healing?
You should not touch, let alone scroll, the earring during the first 2-3 weeks after the piercing. If the jewelry is of high quality, then it has a smooth surface, which eliminates the possibility of the product growing into the fabric of the bridle.
If you regularly disturb the wound, the scab will come off prematurely and the puncture will constantly bleed. This will lead to tissue scarring and complications in the future.
How to pierce your lip quickly and without pain? Procedure
Disinfect the earring or labret. First, soak the decoration in alcohol for twenty minutes, then boil it in a small bowl of water.
Before the piercing, do not forget to eat well, because after the piercing you should not eat for the next four hours.
Then rinse your mouth with a saline solution (one level teaspoon of salt per glass of warm water). Wash your hands with antibacterial soap and generously moisten cotton wool with alcohol and wipe the outside of the lip area intended for piercing. Let it dry. Then use a marker to mark the puncture points.
All necessary tools should be located near the mirror within easy reach. Hands must be sterile.
Before a puncture, you need to calm down so that your hands don’t tremble. Then, slightly retracting the lip, with a confident movement we push the sterile needle from the dropper through the point marked with a marker, and, inserting the decoration into the hollow catheter, place it in the formed hole. The entire procedure lasts no more than 2 minutes.
Please note that the lip is pierced from the inside. In order for the piercing to be in the planned place, the piercing angle should be maintained (90 degrees). After the decoration is secured, the outside of the wound must be treated with a miramestin solution.
To speed up the healing of the piercing site, rinse your mouth two to three times a day for six weeks and after each meal with a saline solution or a soft pink solution of potassium permanganate.
The piercing causes the lip to swell and the swelling will persist for about three days.
Read: ear piercing or how to pierce an ear at home.
Caring for the puncture site
The mucous membrane of the oral cavity is quickly restored if hygiene procedures and sanitation are carried out correctly.
Tips for caring for the puncture site:
- For 6-7 days after piercing, you need to rinse your mouth after eating.
- Do not use alcohol or manganese to sanitize the oral cavity after a puncture. These products will prolong the healing period of the wound.
- When brushing your teeth, you need to be careful not to snag the earring or injure the frenulum.
- You should not drink any alcohol or smoke for 3-4 days after the piercing.
- Do not touch the jewelry with your tongue or hands, so as not to introduce an infection into the wound or injure the puncture site.
The wound heals in about a month, and discomfort after the piercing lasts only 3-5 days. It is better not to kiss for the first 1-2 weeks after the piercing. Bacteria and viruses transmitted through biological fluids can enter an open wound. There is a possibility of transmitting STDs from a partner through saliva.
Drug treatment of bartholinitis
The main goals of therapy are:
- increasing immunity;
- elimination of infection;
- removal of fluid from the Bartholin gland.
Often, for acute bartholinitis, doctors prescribe antibiotics. They must be taken for at least 5 days. Antiseptic agents for topical use are also prescribed. Tampons with Levomekol ointment are often used, as well as Miramistin solution for irrigation. Important! All antibiotics have side effects and should only be prescribed by a doctor. Increased immunity can be achieved by taking vitamins. Sometimes interferons are additionally prescribed.
Rice. 2. Bartholinitis is an inflammation of the Bartholin gland
Possible treatments for keloid scars
Despite the abundance of advice on the Internet, folk remedies cannot get rid of keloid scars; they can only be used in combination with medications, physiotherapy or cosmetology.
The most popular ways to get rid of keloid scars are drug treatment, that is, the use of gels, ointments, creams and injections in combination with physiotherapy, for example, ultraphonophoresis or electrophoresis and the injection of corticosteroid hormones under the skin. Mesotherapy is also effective - injections into the scar tissue of vitamin complexes and medicinal substances that absorb excess collagen and excess hyaluronic acid.
If conservative methods do not give the expected result, then surgery is resorted to.
Drug treatment
Pharmacy and cosmetic products come in different directions:
- contain interferon;
- corticosteroids;
- enzymes or enzyme-containing preparations.
Interferon-containing products inhibit collagen production. In other words, the scar stops growing in size, however, it remains at the stage to which it has grown now. A similar method of treating keloid scars is used after surgery in the form of injections of alpha and beta interferon.
Injections are given every centimeter along the entire length of the scar; the course lasts 4 months.
Corticosteroids can be administered either on their own or in combination with other substances and any therapy. They are injected not into the keloid scar itself, but into the nearest place next to it. This protects from further thickening of the scar, and, despite the course of treatment - 5 weeks, relapses are observed in 20-30% of patients.
To prevent re-formation of the scar, therapy is supplemented with laser or surgical removal of the scar. These methods are very painful and do not exclude relapse (re-formation of a scar). Laser resurfacing requires a long recovery period.
Enzyme-containing preparations break down excess collagen and excess hyaluronic acid - the main components of scar tissue. Due to this, the relief and color of the skin are restored. The scar becomes elastic and its active growth is prevented.
Pressotherapy
The method is more close to prevention than to treatment, but some experts note a positive effect.
Various silicone dressings, bandages and plates are applied to the problem area. It is believed that a scar that is constantly compressed decreases in size. Pressotherapy means include:
- cotton underwear and special bandages (recommended to be worn for six months, made to individual measurements);
- silicone and gel pressure plates;
- gel-based liquids - collodion with polysilicone or silicone.
All this can be found in any orthopedic salon or pharmacy, but this method alone will not be able to completely remove the keloid scar. The pressotherapy method is effective only in complex therapy in combination with other methods of scar correction.
Microcurrent physiotherapy
During the procedure, the body is exposed to a weak current, which stimulates metabolic processes in the tissues of the epidermis, the keloid decreases in size and smoothes out.
Stages of therapy:
- treating the scar with an antiseptic;
- applying a drug that destroys the scar;
- connecting the device, applying electric current to the scar;
- remove remaining medication with a tissue.
The procedure is not difficult to perform, however, there are contraindications to it:
- acute viral diseases;
- poor blood clotting;
- pathologies with the heart;
- exacerbation of chronic diseases;
- neurological abnormalities.
This procedure is considered ineffective compared to other types of physiotherapy. Moreover, it is not cheap.
Radiation exposure
Involves controlled x-rays that destroy fibroblasts within scar tissue. The intensity of the rays is assigned based on the severity of the problem: after all, 90% of the total flow will be absorbed by the epidermis, and only 10% will reach the deeper layers of the skin.
However, therapy is carried out only in combination with other treatment, otherwise the risk of relapse increases by 50%.
Contraindications for use:
- scars on the face, neck and chest;
- oncology;
- kidney diseases;
- impaired blood circulation.
The usual radiation dose is 15–20 Gy. The procedure is repeated once every 2 months, but no more than 6 times.
However, radiation exposure is considered one of the most effective methods in the fight against scars, regardless of the cause of their appearance.
Keloid removal with laser
There are several types of laser resurfacing: argon , carbon and dermabrasion . The purpose of the procedure is to evaporate fluid from the scar's connective tissue, causing it to dry out and shrink in size. Dead cells are removed surgically, and the laser procedure itself is performed under local anesthesia.
Advantages of laser removal:
- during the first session, up to 70% of the scar disappears, which indicates a quick visible result;
- The duration of therapy is from 20 minutes to one and a half hours, depending on the complexity of the problem.
The procedure is quite painful and requires a long period of rehabilitation.
To avoid relapse, doctors advise combining laser with other types of treatment for keloid scars: the use of anti-scar gels will be an excellent assistant on the path to healthy skin.
Cryotechnique
Effect of liquid nitrogen on keloid. It burns out scar tissue cells, in their place healthy skin is formed. The contact time of the scar with nitrogen is 10–30 seconds; in case of an overdose, pigmentation is possible, and there is also a high risk of developing an atrophic scar. You need to be extremely careful with this correction method!
A visible effect is achieved in 1–3 sessions, but for better results cryotherapy is combined with hormonal injections with glucocorticosteroids.
However, for large scars, it is better to combine nitrogen cauterization with surgery. The main disadvantage of the method is pain.
Cosmetology
Cosmetic procedures will help make the scar less noticeable. They will not be able to completely get rid of the scar, but in combination therapy these methods are very effective:
- dermabrasion;
- peeling;
- mesotherapy.
Peeling. With the help of peelings, you can polish the scar, even out the skin texture and eliminate pigmentation. As a result, the skin becomes smoother and the scar more elastic.
Deep dermabrasion - exfoliation of the stratum corneum of the epidermis. The procedure is sensitive and involves the use of hardware technology. The cosmetologist decides how deep and long the session should be.
Mesotherapy - injections of heparin, an immunomodulator or a vitamin complex into the problem area. Has an anti-inflammatory and softening effect.
For small scars, dermabrasion or mesotherapy is recommended, while large and old keloids are removed in combination with drug therapy.
Surgery
Prescribed as a last resort when other therapies are not effective enough. Excision of the keloid is carried out a couple of years after its formation and in several stages:
- a small incision with a scalpel on the scar under local anesthesia;
- the edges of the scar are sewn together with cosmetic stitches for better healing of the incision;
- after resorption of the sutures - hormonal injections and enzyme therapy.
After surgery, prevention against relapse is indicated, because a fresh scar is more amenable to correction. During the rehabilitation period, radiation therapy, injections with immunomodulators and hormones, as well as external agents in the form of gels and ointments are often prescribed.
There are things to think about
Yes, a pierced lip looks quite unusual. However, before you dare to take this step, you should pay attention to some nuances that, quite possibly, will make you change your mind or postpone going to the salon for an indefinite time:
- Medical indicators. Even simple rashes during a seasonal exacerbation of ARVI can become the No. 1 reason that does not allow getting a piercing under the lip. Eczema, diabetes, epilepsy, pregnancy and lactation, as well as allergies to metals - all of these are serious medical contraindications that prevent piercing. It is also better for girls during menstruation to refrain from going to the salon for a while.
- Appropriate dress code. Do not forget that piercing is a clear manifestation of informal style. If a girl or guy works in a reputable company where business negotiations are often required, piercing will make a negative impression on the interlocutor.
- Competent choice of master and salon. This is where it gets serious – this issue should be approached with special care. The lack of a license and certificate is a sign that this place should be avoided.
Interesting: Nose piercing
Many people are shy in front of the salon door, fearing that the procedure will be painful. In fact, piercing the upper or lower lip is not as scary as it seems at first glance. If you evaluate the painful sensations during the process of creating a piercing, you can give 6 points out of a possible 10.
In addition, a lip piercing heals very quickly - the tissue in the mouth area is soft and thin, devoid of blood vessels and capillaries. This means that the experience of a professional master will allow you to quickly and efficiently complete the procedure.
How to pierce a septum at home
Most often this is of interest to young people who, for one reason or another, cannot or do not want to contact a specialist. This is normal behavior and it is possible to carry out such a puncture at home.
To ensure that the procedure is as fast and painless as possible, and also does not result in undesirable consequences in the form of infections, the barbell falling out due to the fact that the piercing is rejected, for a successful procedure we will need:
- A friend with a steady hand
- Gloves
- Piercing needle
- Septum clamp
- Miramistin and Chlorhexidine
- Cotton swab
- Titanium decoration
Does it hurt to pierce
Masters who deal with completely different client reactions to pain every day say that everything is very individual. As proof, professionals cite the following statistics: according to clients, only 10% of them feel unbearable pain, strong enough, but not so much as to refuse the procedure - 60%, another about 30% feel various kinds of discomfort that they cannot call pain .
The pain of a puncture depends on:
- The presence of nerve endings at a specific point is almost impossible to predict;
- Low pain threshold for those who decide to pierce their nose;
- The diameter of the instrument used to carry out the procedure;
- Psychological mood.
You should know that you should not pierce your nose during infectious diseases with a high fever, runny nose, or taking blood thinning medications, as serious bleeding is possible. The same goes for alcohol.
How to pierce a septum without pain
Some people who are very afraid of pain take alcohol or various illegal drugs before the piercing procedure. This is unacceptable, since the bleeding may increase, and the effect of the supposed painkiller will suddenly turn out to be the opposite.
15-20 minutes before the procedure, it is advisable to relax enough, breathe deeply, in no case tuning into pain. Some masters use special gels, ointments, sprays, ice compresses that have a local anesthetic effect, while others “talk their teeth” to the client and, seizing the moment, quickly make a puncture and almost as quickly insert an earring into it. Practice shows that the faster the hole is punched, the less pain is felt, although the process of inserting a ring, earring, or barbell can also be painful.
Where exactly should the septum be pierced?
The septum is punctured in the lower part of the nose, but not at the very tip, but next to it, so there is no need to insert the clamp directly inside, the closer to the tip the better, but without fanaticism.
The puncture should not affect any cartilage, but the thinnest part of the nasal septum is pierced. In this case, it is not performed too close to the edge - if you make too small an indentation by inserting an excessively heavy product, gradual destruction of part of the nasal septum may occur, which will require surgical restoration of the lower part of the nose and the impossibility of re-piercing
The finished piercing should not interfere with eating, and after healing, it should not create any discomfort at all.
Well, more specifically
Next, we take ourselves with our fingers at the intended puncture site and feel the first cartilage, which serves as the nasal septum, we should not touch it when puncturing, there is also a second cartilage that we should not touch and it is the lowest part of the nose
Don't hurt
As you understand, our goal for the puncture is what is located between these two cartilages and with the correct puncture there will be a minimum of pain, about a C or a maximum of four out of ten. But you can’t do without tears, this is a feature of the septum.
Disinfection of the nose
Before piercing your nose, you must disinfect it. We take our cotton swab, apply chlorhexidine to it and process it. It is advisable to do this while wearing gloves.
Clamp Installation
Since our friend may be a little embarrassed to pick our nose looking for a suitable place for a puncture, it is better to do it for him, take the clamp and install it in the optimal place where the cartilage will not be affected, and the friend must confirm whether the clamp is installed evenly
- Wear gloves
- We carry out disinfection
- Pull back the lower part of the nose slightly
- Install the clamp evenly
- We make a puncture with a confident hand
- The clamp is removed
- A decoration is inserted into the needle and pulled into the puncture.
Some useful tips when simulating a piercing
If you are going to show off with a fake earring, you should still take care of its quality. This is especially true for those jewelry that will have contact with the mucous membrane. So, for the tongue, lip or nose, it is important to choose a decoy made of high-quality metal or a medical alloy. If you want to buy something made of plastic, pay attention to safe and hypoallergenic products.
It is also important to choose the appropriate adhesive composition. Under no circumstances should you try to attach a fake earring using Super Glue or Moment. This can have extremely negative consequences. Compositions suitable for such procedures are sold in piercing and tattoo shops.
—>