Features of the material
Unlike structurally similar polyamides, Deflex exhibits high levels of functional elasticity, allowing it to be classified as a semi-rigid thermoplastic. This provides the material with a number of advantages, since prosthetic structures made on its basis are superior to acrylic models in many respects.
In particular, the polyamide in question is resistant to temperature changes, which eliminates hardening and softening of the structure when eating hot or cold food. Minimal porosity and high texture density guarantee strength and durability of the structure, capable of withstanding significant mechanical loads. Deflex reacts minimally with liquids, preventing the formation of plaque, does not absorb odors and is impervious to aggressive coloring pigments. Due to the structural features of the material, the thickness of the finished prosthesis is almost half that of analogues made of nylon or acrylic, which ensures ease and comfort of wearing, and also eliminates the possibility of speech defects developing during the adaptation period.
Research shows that dentures made from Deflex polyamide allow you to correctly distribute the chewing load on the dentition, preventing the mixing of supporting units, and maintaining the original position even under significant external influence. In addition, the material does not provoke an allergic reaction, which, combined with a visually invisible, colorless structure, makes it the optimal choice for prosthetics.
Professional approach to solving complex dental problems
We especially recommend Deflex dentures to patients who suffer from gum disease and allergic reactions. Such structures can replace one or several teeth; moreover, they can be used to restore a complete row of teeth.
When turning to Dentium, many patients who have lost almost all their teeth refuse to have fully removable dentures installed. The use of Deflex structures can effectively solve this problem, since they only need to be removed for cleaning during hygiene procedures. Caring for removable teeth is simple – all you need to do is use high-quality toothpaste and a soft-bristle brush.
If you have lost one or more teeth, contact Dentium immediately and we will find an effective solution to the problem. Our dentures are distinguished not only by their excellent quality and durability, but also by their natural appearance, so you will not experience psychological discomfort even with full prosthetics.
Areas of application and contraindications
The range of uses of polyamides is quite extensive. Thus, the factors determining the need for installation of prostheses made of Deflex material include:
- Detection of defects and anomalies, including partial edentia;
- Complete absence of dental elements on one of the jaws;
- The patient is allergic to metal compounds.
Due to the reliable fixation of supporting elements, polyamide prostheses are recommended in the treatment of patients with periodontal disease and periodontitis, which is due to the absence of prerequisites for increasing the mobility of the remaining units. In addition, the models under consideration are used in situations where enamel preparation is excluded for medical reasons.
The strength and rigidity of dentures allows them to be used by people whose work or sports activities involve intense impact on the dentition. It is almost impossible to break the structure or get injured due to its displacement. In addition, in situations where the patient is prohibited from implantation, the polyamide design becomes a worthy alternative.
The minimum number of contraindications for use is another advantage of Deflex. The list of restrictions on the installation of prostheses comes down to the following factors:
- Identification of pathologies of bone tissue structure;
- Diagnosis of mental disorders;
- Presence of cancer;
- Acute or chronic inflammatory processes.
In addition, removable prosthetics are not recommended for patients undergoing radiation therapy, or those suffering from depression, alcohol or drug addiction.
Installation steps
The manufacture and installation of any model of removable systems is faster and easier than non-removable products. The entire process of restoring missing teeth can be divided into 2 stages: clinical and laboratory.
The clinical stage includes the following activities:
- Study of anamnesis . The doctor interviews the patient about his state of health, living conditions and occupation, studies his medical record in detail, and also finds out whether he has had experience with prosthetics and how comfortable the device was.
- Instrumental examination of the oral cavity, which determines the condition of the mucous membrane, remaining dental units, chewing muscles, and the quality of oral hygiene.
The sensitivity of teeth is assessed, the symptoms of dental pathologies are identified and the degree of their severity is determined. - Hardware examination of the dental system. Before prosthetics, CT (computed tomography), orthopantomogram, radiovisiography, MRI are used
- MRI (magnetic resonance imaging). The results are necessary to determine the limitations or indications for prosthetics, the choice of technique for restoring the dentition and the type of structure.
Thanks to a complete examination of the dental system, a specialist can identify hidden dental pathologies, obtain information about the quality, density and volume of the jaw bone, the condition of the alveoli, dental roots, periodontal tissues and the temporal joint. - Preparing the oral cavity . Hygienic cleaning, removal of remaining roots that cannot be restored and impacted dental elements, and treatment of identified pathologies (inflammation, caries, etc.) are required.
- Selecting a removable device model. Taking into account the number of remaining teeth, the condition of the oral cavity, and the location of the defect, the orthopedic dentist selects a design model.
- Receiving an impression. Using silicone or alginate mass, an impression of both jaw arches is made.
After the impression arrives at the laboratory, the laboratory stage of prosthetics begins. The entire creation process takes place in the following sequence:
- The impression technician casts models of both jaws (entirely or only certain areas), from which the prosthetic product will later be made.
- The specimens are secured so that the position corresponds to the patient's centric occlusion. To avoid making mistakes, an occlusal roller is made, which is sent to the dentist to determine the patient’s occlusion.
- The model is fixed on the articulator. In this position, a model of the future prosthesis is cast from plaster. The cushion is removed and artificial teeth are placed in its place.
- The sample is sent for the first fitting , during which the correct selection of the shade of artificial teeth to real ones and the accuracy of closure of the jaw arches are tested.
- Fit. After checking, the model is returned to the laboratory, where the technician, taking into account all the comments, forms the final version of the design.
The finished product is tried on again for the patient. It should fit perfectly in all respects. If deficiencies are found, the design must be adjusted.
Watch the video to see how the Deflex prosthesis is made.
Advantages and disadvantages
The positive aspects of using the structures in question, noted by both dentists and patients, include:
- Correct distribution of mechanical load on the maxillary region;
- Resistance to temperature fluctuations;
- Reliability and density of fixation, including retention;
- Minimal adaptation period and absence of discomfort;
- Easy care and cleaning of the prosthetic system;
- Immunity to odors, dyes and other negative factors;
- Preservation of taste perception and speech structure.
Thus, Deflex technology is superior to removable dentures made of acrylic or nylon in most respects. However, there are also disadvantages, including:
- Manufacturing and installation costs. Prostheses made of polyamide are more expensive than their analogues, which, however, is compensated by their operational and aesthetic characteristics;
- Insufficient brand awareness. Due to the fact that Deflex is just entering the Russian market, name recognition and assessment of advantages are still inferior to those of competitors;
Impossibility of repair. The polyamide structure eliminates the possibility of gluing or re-welding the structure.
Advantages and disadvantages
Before making a final decision, we suggest that you familiarize yourself with the main advantages of new generation orthodontic structures:
- Ensuring uniform distribution of chewing load.
- Resistant to high and low temperatures.
- Stable fixation in the oral cavity.
- Excellent adhesion to gums, retention.
- Painless and quick adaptation.
- No impact on the gums and mucous membranes of the mouth, due to which the risk of injury is reduced to zero.
- Ease of use due to low weight.
- Durability.
- Easy to maintain (no need to use additional equipment for cleaning).
- High strength, which eliminates breakage and the formation of defects even with strong impacts.
- Resistant to constant exposure to liquids, which ensures the preservation of the original shade.
- High aesthetic values.
- No effect on the taste of food.
Such an impressive list of advantages is typical only for polyamide prostheses produced under the Deflex brand. Analogue products made of nylon or acrylic have only individual advantages.
The designs in question have few disadvantages:
- High price. Not every patient has enough funds to install a polyamide prosthesis, so when choosing orthodontic treatment, it is important to take into account all the features of the clinical picture.
- Little application experience. Since the material was recently invented, experience with its use is limited. Not every clinic offers patients the manufacture of polyamide products.
Impossibility of restoration. Broken polyamide structures cannot be repaired. The only solution will be re-prosthetics.
In what cases are Perflex prostheses used?
- for the treatment of diseases of the mandibular joint;
- for the treatment of patients with weak dental defects;
- for patients suffering from diabetes, cardiovascular diseases and allergies;
- for people involved in extreme sports and those whose work involves danger (rescuers, firefighters, etc.), because a product made from Perflex-T is extremely difficult to break;
- for people with periodontal disease (dentures do not loosen teeth).
Thermoplastic dentures are well suited for those patients who are unable or unwilling to process their teeth for dentures. The product meets all hygienic and therapeutic requirements. In addition, when another prosthesis with metal parts is already installed, Perflex-T does not disturb the pH of the oral cavity.
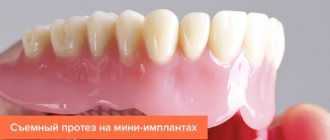
Fixation of Perflex T-Crystal removable dentures on implants
The scope of application of Perflex prostheses is very wide, however, only a qualified doctor can make an accurate conclusion about the need for installation. Call us or fill out the application form to make an appointment.
Reviews
Polyamide material Vertex, intended for the manufacture of removable dentures of the maxillary rows, is gaining increasing popularity both among dental technicians and among patients.
This is explained by the high performance characteristics of the finished product, as well as its similarity to the natural elements of the dentition.
Share information about the advantages and disadvantages of Vertex artificial teeth in the comments section of the article.
If you find an error, please select a piece of text and press Ctrl+Enter.
Tags dentures Vertex removable dentures
Did you like the article? stay tuned
Previous article
What are the most effective injections into the gums for periodontal disease?
Next article
Provocateurs of alveolar bleeding and ways to combat complications
Automatic thermal injection press Deflex Integra 300 + starter kit
Deflex Integra 300 + starter kit
Deflex Integra 300 + starter kit
Automatic Micro Injection Denture Making Machine with Starter Kit
| Equipment: Deflex Integra 300 with starter kit | |
| Injection device Deflex mad 1300 | 1 PC. |
| Deflex Polyamide cartridges | 1 PC. |
| Deflex Acrylato cartridges | 1 PC. |
| Deflex M10XR cartridges | 1 PC. |
| Deflex Supra SF cartridges | 1 PC. |
| Deflex Fluence cartridges | 1 PC. |
| Deflex cuvette | 1 PC. |
| Heat-resistant silicone grease | 1 PC. |
| Anti-adhesion lubricant | 1 PC. |
| Deflex polishing paste | 1 PC. |
| Fluff brush | 1 PC. |
| User manual | 1 PC. |
Deflex INTEGRA 300 Automatic programmable thermal injection machine.
The design of the heat press makes it possible to press all types of thermoplastic materials. Thanks to this, the user has the freedom to choose the material that best meets his requirements. An intuitive panel for setting denture casting modes simplifies the work of the dental technician. Automatic process control ensures stable quality of manufactured dentures. Vertical loading of the crushable cartridge and uniform pressure guarantee minimal shrinkage of materials.
- Automatic operating mode
- Heating the cuvette
- 10 Preset programs, 4 of them are configured for Deflex material, 6 programs can be programmed for other materials
- Digital membrane panel
- Sound alert robots
- Pneumatic injection cylinder
Built-in pressure regulator and pressure gauge
- Maximum temperature 500 ºС
- Recommended temperature up to 390 ºС
- Built-in heater
- Warming up the cuvette from cold to hot
- Practical cuvette clamp with protective cover
- Compact design
- Dimensions: 65x30x15 cm
DESCRIPTION
INSTALLATION
Using a hose with a diameter of Ø 8mm, connect the compressor to the compressed air inlet of the machine.
1. Air pressure: The machine is supplied set to a compressed air pressure of 5-6 atm (80/90 psi). If you need to change this value, follow the "Modify Pressure" instructions. 2. Compressor characteristics: The compressed air pressure at the compressor outlet should be set to a minimum of 7 atm (100 psi). 3. Air consumption: To supply compressed air, it is recommended to use a hose no longer than 5 m. A longer hose may cause a lack of air at the time of injection, even if the pressure gauge of the injection machine corresponds to the recommended range (5-6 atm). A sign of a lack of air can be a drop in pressure at the inlet of the machine, but the pressure gauge needle will not show a pressure value below 4 atm (55 psi).
Power supply
Insert the power cord into the outlet of the injection machine, and then plug into the electrical outlet.
INJECTION PARAMETERS
Pre-configured programs (#1-#4)
The machine has 10 injection programs. Four of them are configured for various Deflex materials (see table No. 1). The remaining 6 programs are free.
| Material Program | Classic SF 01 | Acrilato FD 02 | M10XR 03 | Supra SF 04 |
| Temperature | 280ºC / 536ºF | 265ºC / 509ºF | 305ºC / 581ºF | 260ºC / 500ºF |
| Т1 Melting time | 15 minutes | 15 minutes | 15 minutes | 15 minutes |
| T2 Injection time | 30 seconds | 30 seconds | 30 seconds | 30 seconds |
| Air pressure | 5-6 kg/cm2 75-85 PSI | 5-6 kg/cm2 75-85 PSI | 5-6 kg/cm2 75-85 PSI | 3 kg/cm2 43 PSI |
Table No. 1
Please note the required air pressure for injection of Supra SF (3 kg/cm2=43PSI).
Free Software (#5-#10)
Select the program you want to use using the UP and DOWN buttons. After selecting the desired program, press the “ENTER” button. Then press "Menu" to access the settings:
| Temp | ºC | Temperature |
| T1 | Min (min) | Melting time |
| T2 | Sec | Injection time |
Table No. 2
When you have found a setting you want to change, use the Up and Down keys to change it. After setting the desired value, confirm the operation by pressing “Enter”.
Do this operation with all parameters. After setting all parameters:
a) Press “Enter” again to start the heating cycle.
OR
b) Press the “Cancel/E” key to return to the main menu
Air pressure setting
Air pressure is adjusted by default to 5-6 kg/cm2 = 75-85 PSI. If necessary, you can configure it. Pull the pressure regulator (toward you) until it clicks, then turn clockwise to increase pressure or counterclockwise to decrease pressure. Once you have reached the desired setting, press the control until you hear a click.
A test injection (without flask or cartridge) is recommended. This allows you to equalize the pressure and set constant parameters.
INJECTION PROCEDURE
Step 1: Turn on the machine
Press the “ON” button to turn on the machine.
The machine will not start to heat up until a program is selected.
Step 2: Select a program
Select the program that will be used depending on the material (see table No. 1). Confirm your program selection by pressing the ENTER button.
Step 3: Start the heating cycle
Press "ENTER" to begin the machine's warm-up cycle.
The heating cycle (the time it takes for the machine to reach the set temperature) is approximately 20 minutes. Do not install the cartridge into the machine at this time.
Once the temperature is reached, the injector will beep, it is necessary to confirm the start of the injection cycle, but before confirming the start of the cycle, steps 4,5 and 6 below must be completed.
Step 4: Treat the cartridge with silicone
Select the desired cartridge, open the container and treat the cartridge with silicone on all sides, avoiding treatment of the lid and base.
Note: Pre-treat the mold inside the oven with silicone.
Step 5: Installing the Cartridge
Insert the cartridge. The top of the cartridge is indicated by a round symbol in the center.
Step 6: Installing the Cuvette
Step 7: Start the injection cycle
Press "ENTER" (the display will switch from "Enter to start" to "Temp:__ ºC T1_")
| Automatic injection Once the time period set in Time 1 (15 minutes, or whatever was programmed) has been completed, the material will be introduced automatically. The injection will take 30 seconds (or whatever was programmed in Time 2), then the piston will lower automatically. This will be shown on the display when the text "EXPULSION " appears. Also, until the flask is ejected, an alarm will sound. |
Step 8: Removing the Cuvette
Next steps after completion of injection:
— Unscrew the cuvette regulator
— Remove the cover of the device completely
- Using a glove, hold the cuvette and at the same time press “E/CANCEL” to activate ejection (no need to hold the button).
| Do not try to force or speed up the ejection of the cuvette by pulling upward by hand. Simply hold the cuvette tightly with your hand until the plunger releases. |
After removing the cuvette, you can press “E/CANCEL” again to lower the plunger. Otherwise, the piston will fall down automatically after 10 seconds.
Attention!: Do not touch the cartridge after injection, it is very hot!
| Repeated injections To perform a new injection using the same program, repeat everything from step 4. If you want to set new injection parameters, start from step 2. |
CARE AND MAINTENANCE
Cleaning mode:
The injector comes with a "Cleaning Mode" module, which allows you to freely raise or lower the piston to remove residual silicone base and aluminum.
To do this you need to do the following:
With the machine turned on, hold down the MENU key until CLEANINGMODE appears on the display, then press ENTER. The machine will enter cleaning mode. Open the lid completely and press “E/CANCEL” as many times as necessary to raise and lower the piston, thereby carrying out the cleaning process.
— Cleaning a heated oven. Use a swab by wrapping a paper towel around the tip of the tweezers. Wipe off any dirt or remaining residue with a swab.
— It is very important to clean the inner surface of the cuvette from any remaining plastic and other elements. Without cleaning the cuvette, the material becomes contaminated and the injected prostheses are damaged.
— The oven cleaning process should be carried out once a day or as many times as necessary to maintain complete cleanliness.
WARNINGS:
Hot surface -
Signal to read the instructions -
Grounding required -
— Keep in mind that the device is connected to a voltage of 220V or 110V.
— The power supply must be grounded and the machine must not get wet.
DANGER: Do not touch the oven while it is on.
DANGER: Never place your hands between the cuvette and its holding device.
It is normal if the display shows a temperature 4ºC higher or lower than the programmed temperature. This is not a sign of a device malfunction.
The INTEGRA 300 has an injection sensor that prevents the pneumatic piston from being activated if the lid is not closed correctly. The sensor does not work only in “Cleaning Mode”.
WARRANTY
- The warranty period established by the supplier is 1 year from the date of purchase of the machine.
- The warranty does not apply to malfunctions resulting from improper use of the machine.
- Any unauthorized repair of the machine by the user will void the warranty.
- The warranty does not cover defects resulting from accidents, incidents or natural phenomena.
- When operating the machine, use a lubricant recommended by Deflex or its authorized distributor (see Injection Procedure, Step 2).
The warranty does not cover defects resulting from the use of any other lubricants.
Watch video >>>
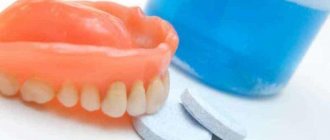
Care and storage of nylon prostheses
The products can be worn around the clock. They only need to be removed for hygiene purposes - cleaning. After eating, you should rinse with plain running water every time. At least 2 times a day, preferably at the beginning and end of the day, you should thoroughly clean off food debris using a special brush. Experts do not recommend using aggressive means.
They can be cleaned using regular soap and a brush. The service life of the medical system will be extended by using special baths and pastes for these purposes several times a week, and using antiseptic liquids purchased for these purposes at the pharmacy. Periodically, once every 2-3 months, it is advisable to bring nylon dentures to the clinic for more thorough cleaning.
However, despite the exhaustive information, only an experienced dentist can answer the question of which dental prosthetic option is best for you. A professional will competently assess the condition of the oral cavity, will certainly listen to your wishes and offer the best prosthetic option suitable for you.
Back
Price issue
In large clinics, the cost of restoring teeth with a complete Deflex denture varies from 40 to 70 thousand rubles. The final price depends on the following points:
- the amount of treatment performed before installation;
- method of fastening the structure;
- specialist qualification;
- status and pricing policy of the clinic.
Partial models will naturally be 15-25 thousand rubles cheaper. A design that will replace only 1-3 teeth costs no more than 15 thousand rubles.
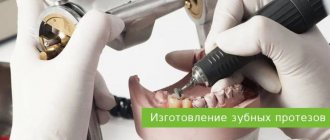
Stages of manufacturing a flexible prosthesis
To create nylon dentures, you must first treat the teeth, perform removal according to indications, and then proceed to the following steps:
- taking impressions of jaws in a clinical setting;
- plaster models are made in the laboratory;
- a wax prototype of the prosthesis is cast, tried on, and finalized;
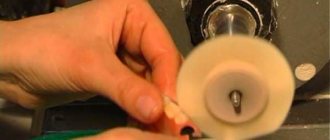
- a nylon final version is created, matched to the color of the gum. The equipment used is a heat press, in which polymer granules are melted and an individual mold is poured in a liquid state. After hardening, the structure is polished.
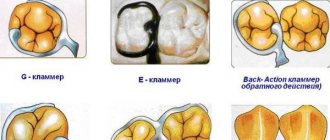
Clasps are a continuation of nylon dentures and are therefore completely invisible on the jaw even when smiling and talking.