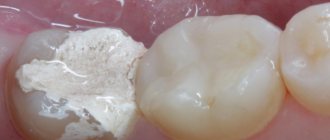
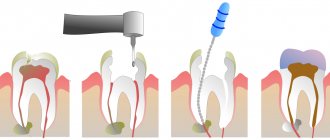
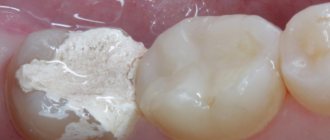
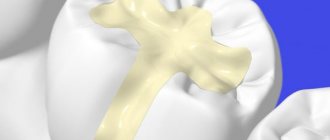
Fillings made from a material such as a chemical composite mimic and replace natural tissue lost due to disease, subsequent treatment, or injury. Dentists use them to fill large cavities, including teeth with removed pulp. They are affordable and have excellent durability characteristics. Restoration using them will ensure full restoration of chewing function, and this despite the fact that it will serve for a long time!
Therapists at the CELT Dentistry Department widely use composite fillings to restore dental tissue. They have modern materials at their disposal, which, along with precise adherence to technology, make it possible to obtain beautiful, functional and durable restorations. Treatment is carried out on the basis of a contract with a guarantee. You can find out the cost of composite fillings in the price list by going to the “Services and prices” tab. Despite the fact that we regularly update it, we recommend that you check the numbers by contacting our information line operators or visiting a doctor.
Consultation with a dentist-therapist - 1,000 rubles.
Filling made of chemically cured composite—RUB 1,500.
At CELT you can get advice from a dental specialist.
- The cost of a consultation with a dentist-therapist is 1,000
Make an appointment
Types of fillings made of chemically cured composite
Chemical composite materials began to be used in dentistry in the 60s of the last century. Fillings made from it are called ordinary or cement. Their distinctive feature is that they crystallize due to a chemical reaction, which is launched during the process of mixing their components. They themselves are very durable, which can be called both an advantage and a disadvantage. The fact is that their hardness exceeds the hardness of dental tissues, which is why they wear out and the tooth itself is destroyed.
| Types of cement fillings | |
| View | Distinctive features |
| Composite | It includes several components, is characterized by uniform hardening, and lasts about twenty-four months. After hardening, its color may differ from the color of the enamel, so it is best to place it where it will not be visible (on the molar). |
| Glass ionomer | Manufacturing occurs by mixing an aqueous solution of polyacrylic acid and aluminofluorosilicate glass powder. The crystallization effect is achieved through an acid reaction. |
Isolation of tooth from saliva
Skipping this stage or performing it poorly leads to the fact that the filling quickly peels off with the formation of cracks, where pathogenic plaque subsequently becomes clogged.
Sometimes a piece of material simply falls out of the hole, and the filling has to be reinstalled. It is extremely important to prevent moisture from entering the tooth tissues prepared for filling, so doctors cover the patient’s salivary glands with cotton swabs and turn on the air dryer. Unfortunately, such measures are already considered outdated. Even the patient’s breath, filled with moisture, can cause water molecules to settle on the surgical field.
Over the past ten years, dentists have been using rubber dams to isolate teeth. This is a specially designed latex protection that is placed over the tooth being prepared with a scarf. As a result, it sticks out, and the oral cavity is completely covered with a thin layer of synthetic fabric. The rubber dam is attached to the necks of adjacent teeth with special metal clasps, this prevents the latex sheet from slipping when the dentist is working.
The rubber dam perfectly isolates the drilled tooth from any moisture in the oral cavity. But installing the material requires skill and is considered a rather labor-intensive procedure. However, asking the doctor whether he uses a rubber dam during treatment will allow the patient to understand how sensitive the dentist is to the results of his own work and the quality of the filling.
Features and advantages of composite fillings
The price of fillings made from a chemical composite is low: they are among the cheapest available today. This is due to the fact that they are unable to provide a good cosmetic result. At the same time, it is not required when it comes to molars: a darker color will not be a problem, but the structure itself will withstand intense loads during chewing and will last for many years. It contains fluoride, which will prevent the development of caries and destruction of tooth enamel.
Due to its excellent strength characteristics, the average service life of a conventional filling ranges from ten to fifteen years. However, it only depends 60% on the material of manufacture: an important factor in this case is regular and correct oral hygiene measures. Advantages of composite fillings:
- good strength characteristics, hardness;
- long service life;
- low price with simple application;
- high speed of restoration production;
- uniform hardening, regardless of the size and depth of the cavity;
- immunity to the effects of saliva;
- minimal risk of cracking of the filling.
Chemically cured composites are “powder-liquid” or “paste-paste” systems. The rate of their hardening depends on the number of active elements, temperature and the presence of inhibitors. Indications for installing a filling on a tooth made of a chemically cured composite:
- the need to obtain a hard, wear-resistant, durable restoration;
- restoration of a unit with a deep carious cavity;
- restoration of posterior chewing units;
- the patient's request to use budget materials.
How much does a filling actually cost?
But now you come to dentistry, and the doctor offers you a choice of several types of light fillings, of which the cheapest can cost (relatively) from 1,500 rubles, the middle price segment - about 3,000 and the most expensive - 5,000 or more... And which one to choose ?
In the dentist’s office there is hardly anyone to ask: the dentist and the clinic, of course, are interested in selling the most expensive product. And usually the patient has to rely on the integrity of the doctor and accept the choice that the dentist himself offers. We want to help you make an informed choice of filling that meets your needs and capabilities.
So, what does the cost of a filling consist of (in this article I consider only the filling, without taking into account the cost of root canal treatment):
1. Qualification: here we record annual additional professional training and courses (all doctors in our dentistry spend from 30,000 to 150,000 rubles for these purposes every year). You have to save from each filling =).
2. Equipment: standard equipment for a dental office to provide the usual range of services costs from 500,000 to 1,500,000, and this does not take into account the cost of equipment for the X-ray room and sterilization room. To place the most ordinary filling without pain and unnecessary injury, you need a high-speed, water-cooled installation.
3. Premises maintenance or operating expenses: this includes licensing, premises rental, insurance, cleaning, assistant, administrator. It is unlikely that it will be possible to calculate correctly, but in the case of our clinic, each patient’s appointment costs at least 1000 rubles, regardless of the service provided, even if it is just a consultation =). If you are from Moscow, then, by the way, you can sign up online.
4. To install a filling, you also need tools of limited use (short service life or disposable) - such as burs, rubber bands, grinding discs, strips, brushes, wedges, matrices, etc. Yes, these “small things” also add up to a decent amount .
5. Cost of a filling : “Well, finally!”, you say. But it’s not that simple... Before announcing the nominal cost of a filling (filling material), I urge you to review the points above again: without them, this price in no way reflects the cost of the work to install the filling. It is also obvious that the amount of material required to treat a particular tooth is always individual. So, we have an aesthetic dentistry clinic and we use only materials in the “above average and premium” price segment. The material that we usually use for the restoration of chewing teeth costs about 5,000 rubles per syringe (about 10 fillings).
It would seem that what prevents you from putting a cheap filling on an expensive material if it is so inexpensive in itself? Probably nothing. Only I don’t know of such examples.
If dentistry or a dentist, or a clinic saves on good equipment, quality of repairs, advanced training and tools, do you really think that they will choose expensive material for you?
Buying expensive filling material yourself is also not an option. Each material has its own properties and you need experience in its use, or advanced training courses, to get high-quality work.
But if the doctor offers several options for fillings to choose from, it is worth choosing, of course, in favor of the more expensive material.
Reviews about our dental therapists
I would like to express my gratitude to the dentist Elena Nikolaevna Kiseleva and her assistant Svetlana - they are real specialists and at the same time sensitive, not burnt out by years of practice.
Thanks to them, I have been coming back here for many years. Thanks to the management for such doctors! Read full review Svetlana Nikolaevna
13.08.2021
Words cannot express my gratitude to Elena Nikolaevna Kiseleva. This is the best doctor in the world. I got an appointment after many years of being ignored by the dentist’s office and with a bitter experience of treatment in another paid clinic, the mistakes of which had to be corrected in the first visits. Thank you for this... Read full review
Roman Stanislavovich Sh
25.07.2020
Sealing
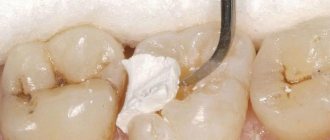
After the above-described list of preparatory measures, the doctor proceeds to actually filling the open hole in the tooth. This is where the creative stage of a dentist’s work begins, because teeth are individual – in color and shape. In an effort to maintain the attractiveness of a smile and ensure the strength of the affected tooth when chewing food, the doctor sculpturally lays the filling substrate in layers. Each layer is illuminated with ultraviolet light, a new layer is applied to the hardened area, and so on until the work is completed.
Differences between a filling made from a chemically cured composite and a filling made from a light-cured composite
The “light” filling got its name from the curing method: it occurs under the influence of a UV-radiation polymerization lamp. Thanks to him, the dentist has the opportunity to give it a certain shape as accurately as possible. After hardening, the material adheres as tightly as possible to the native dental tissues, without differing from them in color. For this reason, such structures are most often used on frontal teeth. Their service life is about five years.
| Differences between regular and “light” fillings | ||
| Parameter | Regular | "Light" |
| Polymerization method | As a result of starting a chemical reaction when mixing components | Under the influence of light emitted by an ultraviolet lamp |
| Application area | Premolars and molars | Smile zone teeth |
| Comfort of treatment | Preparation is a cause of discomfort | Minimal preparation |
| Price | Available | Higher |
| Material toxicity | May release toxins | Non-toxic |
| Color | As it hardens, it becomes darker in color. | Possibility of selection in accordance with the color of the native enamel |
Filling class II cavities with composites in difficult situations
Despite advances in composites in almost every aspect, restoration of Class II cavities is still considered a challenging and time-consuming task for the dentist. To successfully fill a class II cavity, the specialist must ensure that there is no open interproximal contact, inaccurate anatomical contour, inadequate marginal sealing, and prevent postoperative sensitivity, edge staining, recurrent caries, and filling loss.
With more than 70 restorative materials and 50 flowable composites (not including dual-cure composites) on the market, dentists are faced with a difficult situation when choosing the right brand. Since the introduction of the first light-curing composite in 1970, dentists have tried different materials and techniques to achieve successful restorations in a variety of clinical situations. Since setting up the composite is a very delicate process, there are some challenges associated with insulation, adhesion, material selection and polishing. Combining these factors with the high cost and imperfection of the insurance system, doctors have to work not only efficiently, but also efficiently. Dr. Ron Jackson summed up the challenges dentists face every day: “Given the current industry landscape, dentists must have the materials and techniques that allow them to perform posterior restorations faster, easier and more cost-effectively.”
Because of this, many physicians have combined certain materials and equipment to create "their own" Class II cavity repair system based on their own experience and clinical observations. However, this approach is not entirely compatible with the modern approach to dentistry, which includes three dominant features: the latest scientific achievements, the skills and objectivity of the doctor, and the individuality of each patient. With such a huge number of sources of information, such as articles and notes in magazines, web presentations, advice from consultants and representatives, the Internet, and the opinions of colleagues, it becomes increasingly difficult to understand which method or technique is actually worthy of attention.
The application of current dental literature in real practice is especially important when performing direct restorations. One example that illustrates this point is the promotion of Bulk-fill materials in publications to focus on polymerization stress rather than volumetric shrinkage. If we follow the opinions of the literature, then the use of Bulk-fill materials allows us to omit some stages when carrying out restorations, thereby restoring faster.
In addition, more recently, manufacturers have introduced systems and products designed to be used in a specific sequence to achieve consistently optimal results. An example of this is the 3M ESPE Trifecta Method for indirect restorations and DENTSPLY Caulk Class II for direct restorations.
The purpose of this article is to analyze the existing literature regarding flowable bulk-fill composites as materials that can reduce the stages of restoration, and also to highlight important factors that allow achieving high results when filling class II cavities.
Bulk-fill work with liquid materials
Shrinkage of a flowable material can compromise the success of the entire restoration and lead to poor marginal seal, microleakage, microfracture, and recurrent caries. If a fluid material is placed in a narrow space and then polymerized, polymerization stress very often develops. According to Hooke's law, stress is determined by the elasticity of the material under stress. In this case, shrinkage stress is transferred to the surrounding tooth tissue, since the elastic modulus (elasticity) of the tooth is much higher than the filling material. As a result of the transfer of shrinkage stress to the tooth, damage to its own tissues may occur. This can lead to postoperative sensitivity, microfractures, disruption of the adhesive layer, microleakage and recurrent caries, as well as loss of marginal seal. Several factors have been identified as influencing the shrinkage stress of a restoration: the size and geometry of the restoration (C-factor, depth and diameter), the materials used and the curing protocol.
The layer-by-layer filling technique has been proposed to reduce the shrinkage stress of composite materials. More recently, there have been major disagreements among scientists on this issue. Versluis and Abbas showed that minimizing deformation and deflection can be achieved using a bulk-fill technique. Lee and Park argue that layered application is a successful solution for controlling polymerization stress. Despite the varying conclusions, layering is generally the recommended technique preferred by many dentists, taking into account additional factors such as depth of cure, adaptation and adequate formation of the bond layer.
The new category of bulk-fill flowable composites claims to work effectively with a 4 mm layer, as well as reduced polymerization shrinkage. The first liquid-flow material Bilk-fill (Superfil SDR flow DENTSPLY Caulk) was introduced in 2009 (Photo 1). There are currently 4 bulk-fill flowable composites on the market: Superfil SDR flow, Filtek Bulk Flow (3M ESPE), Venus Bulk Flow (Heraeus Kulzer) and x-tra Base (VOCO America).
Photo 1: Liquid Superfil SDR (Dentsply Caulk)
Ilie and Hickel studied Superfil SDR in comparison with other materials and found that Superfil shrinkage was 1.1 mPa, while Esther-X (Dentsply Caulk) and Filtek Supreme Plus Flow (3M ESPE) were 5.3 mPa and 6.5 mPa respectively. The authors hypothesized that part of the reduced shrinkage of Superfil SDR is due to slow polymerization and greater fluidity. Compared to other composites, Superfil SDR shows the lowest hardness, which can be explained by its lower volumetric fill (44%). For this reason, the Superfil SDR flow instructions recommend covering the occlusal portion with 2 mm of universal restorative material.
The C-factor is determined by the stresses created by the cavity configuration in relation to bonded and uncoated surfaces. According to Feilzer: the higher the C-factor (the more bonded surfaces), the higher the stress generated (eg classes I and II). Conversely, cavities with more unbonded surfaces result in less shrinkage stress (Class III and IV cavities). Two recent studies have also suggested that cavity depth and cavity diameter may influence shrinkage, thereby affecting microleakage. By studying the effect of bulk-fill filling of cavities with a high C-factor with liquid materials with low shrinkage (Superfil SDR flow), Van Ende, la Macorra and Gomez-Fernandez proved that a 4mm layer does not reduce adhesive strength due to shrinkage stress. The authors concluded that the bulk-fill technique is desirable for high C-factor restorations, and dentists in such situations should use low-shrinkage materials to avoid debonding and microleakage. These findings were in agreement with those of Roggendorf, who indicated that it was possible to use low-shrinkage bulk-fill materials in the open sandwich technique without negatively affecting the edge seal.
Stages of Class II restoration
Insulation
The gold standard for isolating prepared teeth before placing composite material is a rubber dam. However, in the case of Class II cavities, isolation using matrices becomes difficult. The matrix system should not only help achieve marginal sealing, but also follow the anatomical contour of the tooth and recreate interproximal contact. Historically, circular matrices (Tofflemire Type, AutoMatrix) have been used in such situations, but they are not an ideal option. While they are quite effective at isolating the prepared tooth, Tofflemire matrices are of little use in creating proper contact, which then results in food retention in the dental space.
In 1986, BiTine sectional matrices (Darway Dentsply Caulk) were introduced, which made it possible to create more accurate contacts in class II. Nowadays, sectional matrix systems such as Palodent Plus (Dentsply Caulk), V3 (Triodent) and Composi-Tight 3D (Garrison Dental Solutuions) are designed to overcome all the disadvantages of circular matrices and the disadvantages of BiTine systems (for example, tooth separation, ring placement and stabilization, prevent the ring from slipping) (Photos 2 and 3). In addition, the sectional ring matrix systems mentioned all include anatomical wedges for improved creation of precise interproximal contact. Figure 4 shows a radiograph of a Class II composite restoration performed with a circular matrix and wood wedge, and a sectional matrix system and anatomical wedge.
Figure 2: BiTine (Darway/Dentsply Caulk) sectional matrix system placed in the mouth to restore tooth #4. Please note that the ring helps adapt the matrix to the tooth wall, but does not contact the adjacent one and does not improve separation to create the correct contact point.
Photo 3: Palodent Plus Sectional matrix system (Dentsply Caulk)
Figure 4: Radiograph showing the upper premolar restored using a circular matrix and a triangular wood wedge. The lower premolar was restored using the Palodent Plus Sectional matrix system and anatomical wedges. Note the more regular gingival contour and contact point of the lower tooth.
Adhesion
Since 1955, Buonocore's acid etching technique has made adhesion to enamel quite successful. However, achieving optimal bonding to dentin remains a highly challenging procedure due to microleakage, material infiltration and penetration, hydration, and postoperative sensitivity. To eliminate these factors, the evolution of dentin bonding has switched from a full-etch technique, meaning the application of 30% or 40% phosphoric acid to the enamel and dentin, to a sapro-etch technique, where phosphoric acid esters are contained in the bonding agent, and there is no separate application of the etching gel to the tooth.
Recently, a third technique has emerged that promotes hybridization of the remaining smear layer of dentin and acid-etches the enamel to maximize bonding force and prevent marginal leakage. The selective etching technique is designed to enhance the positive aspects of both techniques and produce an optimal final result. In two recent studies, a meta-analysis conducted by Heintze and Rousson concluded that the best results are obtained with a rubber dam filling and enamel etching technique. At the time of writing, there are 3 universal adhesives on the market that can be used in all three techniques: Prime&Bond Elect (Dentsply Caulk), Scotchbond Universal Adhesive (3M ESPE) and All-Bond Universal (Bisco Dental Products).
Composite
The placement of composite material involves a precise and strategic process. Challenges for the clinician include: appropriate adaptation of the material to the prepared tooth, choice of bulk-fill versus layer-by-layer technique, polymerization shrinkage and stress of the material, depth of cure, and handling of the material itself.
Historically, doctors have used flowable composites as linings in class II cavities because of their good penetration ability and adaptation to cavity walls. However, the use of flowable material for marginal sealing in class II cavities remains a controversial issue. Some studies report a reduction in microleakage with the use of flowable composites along the gingival margin, while others criticize this practice. There is an opinion that the localization of cavities at the gingival margin above or below the cemento-enamel junction is the best test for filling material. In these studies, GIC appears as a material with good adhesive properties and low shrinkage compared to fluid materials.
Since the currently available flowable Bulk-fill composites are not desirable for use on occlusal surfaces, a final layer of conventional restorative material is required. To simplify the selection of a material that can provide good results in all clinical situations, Dentsply Caulk introduced TPH Spectra Universal Composite (Photo 5). This new composite is based on TPH3 technology and contains nano-hybrid and micro-filled components. The result is a composite that has proven itself well in both restorations in the anterior and posterior segments. It has a transparency similar to natural teeth, high-quality polishing ability, color stability and wear resistance. TPH Spectra is also available in two versions: a creamy low-viscosity formula and a high-viscosity formula. For two viscosity options, the physical properties are absolutely the same. Since consistency is a very individual and subjective indicator, dentists have the opportunity to make a choice for each specific clinical situation.
Photo 5: TPH Spectra (Dentsply Caulk)
Polishing
The final step to achieve excellent clinical results when filling class II cavities is contouring with the tip at high speed, followed by finishing and polishing of the restoration. The polishability of a material is based on filler type, shape and composition. Recent studies have shown that hybrid and microfilled composites improve esthetics and extend the life of the restoration by reducing stainability, preventing microbial accumulation, inflammation of the gingival margin and wear of the filling. The Berger study looked at 3 composites and polishing systems (Dentsply Caulk, 3M ESPE and Cosmedent) supplied by the same manufacturer. According to the authors, for the best possible polishing of composites, polishing systems from the same manufacturers as the materials should be used.
In 2009, the names of polishing systems rated as good or excellent were published:
Super-Snap Rainbow Technique Kit (Shofu Dental), Enhance (Dentsply Caulk), FlexiDisc (Cosmedent) and OptiDisc (Kerr).
Clinical cases
Clinical case 1
A 32-year-old woman came to the clinic. Upon examination, an open interproximal cavity was revealed, in which food retention occurred, in the tooth on the lower jaw on the left. The cavity was formed due to a fracture of the composite on the disto-occlusal side of tooth No. 20. The patient desired restoration and closure of the cavity (Figure 6).
Photo 6: Tooth No. 20 before preparation, inadequate condition of the filling on the disto-occlusal side
After local anesthesia with a carpule of 4% articident with epinephrine 1:100,000 (Dentsply), the existing filling was removed with tips at high and low speeds, and a Snoop Caries Detector (Pulpdent) was used to detect caries (Photo 7).
Figure 7: Completed disto-occlusal preparation, checking Snoop Caries Detector (Pulpdent)
After placing the rubber dam, the entire prepared surface was etched with 34% phosphoric acid gel for 20 seconds, then thoroughly rinsed with water. Isolation of the prepared tooth was performed by Palodent Plus (Photo 8). Prime&Bond Elect was rubbed into the cavity for 20 seconds, then air-dried for 5 seconds to remove the solvent. The bonding agent was light cured for 20 seconds (Photo 9).
Photo 8: Isolation of tooth #20 using the Palodent Plus Sectional matrix system
Photo 9: Application of Prime&Bond Elect (Dentsply Caulk) - universal adhesive
The first layer of Superfil SDR was applied to the cavity and then cured for 20 seconds (Photo 10). TPH Spectra low viscosity shade A2 is applied in a 2 mm layer and also cured (Photo 11).
Photo 10: Adding No. 20 Superfil SDR into the tooth cavity using a special tip
Photo 11: Low viscosity TPH Spectra Universal Composite was applied as the final occlusal layer.
The resulting restoration was finished and polished with Enhance and PoGo (DEntsply Caulk) (Photos 12 -14).
Photo 12: Tooth No. 20 after filling
Photo 13: Palodent Plus Pin Tweezers (Dentsply Caulk) are used for easy matrix removal.
Photo 14: After finishing and polishing, final appearance of tooth No. 20
Clinical case 2
A girl came to the clinic complaining of a missing filling. Intraoral examination revealed that the disto-occlusal amalgam filling on tooth #12 had fallen out (Figure 15). The patient did not report pain, but reported sensitivity when drinking cold drinks. After clarifying the medical history and evaluating the radiographs, it was decided to perform a direct restoration with composite material.
Photo 15: Preparation of tooth No. 12
Anesthesia was performed with a carpule of 2% xylocaine with epinephrine 1:100,000 infiltration from the buccal side. Preparation was carried out with a carbide bur at high speed and a round bur at low speed. Complete removal of carious decay verified by Snoop Caries Detector.
Due to the depth and size of the cavity obtained after preparation, it was decided to use the selective etching technique with Prime&Bond Elect. The technique was chosen for maximum adhesion to enamel and minimal etching of dentin. The enamel was etched with 34% phosphoric acid and then washed with water (Photo 16). Prime&Bond Elect was rubbed into the surface for 20 seconds, air dried for 5 seconds and light cured for 20 seconds (Photo 17). Isolation was carried out by Palodent Plus (Photo 18). The shade of the teeth is approximately defined as A2 according to the VITA Classic (Vident) scale. TPH Spectra high viscosity shade A2 is placed in a 2 mm layer (Photos 19 and 20). Each layer of composite is cured for 20 seconds.
Photo 16: Selective etching of tooth enamel No. 12
Photo 17: Tooth #12 is isolated with the PalodentPlusSectional matrix system. Due to problems with mouth opening, a rubber dam was not applied to this patient.
Photo 18: Prime&BondElect was rubbed onto the prepared surface of tooth No. 12
Photo 19: High-viscosity TPHSpectra introduced into the cavity
Photo 20: Tooth No. 12 after curing of the material before removing the matrix
The final restoration is finished and polished to achieve precise shape and contour. After checking the occlusion, the composite was polished with Enhance and PoGo (Photo 21).
Photo 21: Final view of the restoration of tooth No. 12
Final comment
Modern restorative materials can provide superior results when applied in a careful and precise manner. Creating systems that provide step-by-step instructions can greatly assist dental practitioners. This approach already exists in implantology, orthopedics, and now it has been created in the therapeutic section, making it possible to achieve the highest possible results when filling class II cavities.
Posted by Jason H. Goodchild, DMD
What determines the price of a chemical composite filling?
The cost of installation is calculated by the dentist after examination and diagnosis. It depends on:
- the degree of tooth decay and the need to use additional means (for example, linings for caries);
- area of location of the affected dental unit;
- pricing policy of the dental clinic and the level of qualification of the dentist.
You can make an appointment with CELT dentists online or by contacting our information line operators.
Make an appointment through the application or by calling +7 +7 We work every day:
- Monday—Friday: 8.00—20.00
- Saturday: 8.00–18.00
- Sunday is a day off
The nearest metro and MCC stations to the clinic:
- Highway of Enthusiasts or Perovo
- Partisan
- Enthusiast Highway
Driving directions
Grinding and polishing of teeth
The last stage in the treatment of caries is adjusting the new filling to the bite, giving it shine and final alignment. Doctors often use pieces of carbon paper and ask the patient to lightly press the colored piece of paper with his teeth. Based on the spots that appear on the surface, the doctor sees where the extra protrusions are located and polishes them so as not to create unnecessary tension in the jaws when closing the teeth.
You should not endure the resulting discomfort and hope that over time you will be able to get used to the disturbing formation. The doctor will remove the excess with a special grinding bur, but the filling will not go anywhere and will remain in the tooth to protect it from caries.
Now anyone can imagine the extensive work a dentist does when treating the most common dental disease on the planet. It is unlikely that the inhabitants of the globe will be able to avoid developing caries even once in their lives, but everyone is quite capable of preventing multiple extensive lesions.
