2076
Gypsum is formed as a result of drying out water bodies by deposition of sediment from compounds saturated with sulfate salts, or by weathering of rocks.
This material, created by nature, is considered to be the most common auxiliary mass in dentistry, the demand for which has not decreased over the years due to its beneficial properties.
A little bit of history
People knew about its unique properties back in ancient times. Gypsum was originally used as a building material. Even before our era, it was used in Egypt for the construction of pyramids and other architectural structures.
Mass mining of the material began around the 12th–13th centuries. ad. Based on water, it began to be used throughout construction for plastering and finishing work. Various architectural elements were made from gypsum.
In the middle of the 19th century, or more precisely, at the height of the Crimean War, the Russian surgeon N. I. Pirogov was the first to use plaster mass during the treatment of bone fractures received from a gunshot wound.
To fix the bone fragments, he used bandages soaked in liquid plaster. A similar technique is actively used in surgery today.
In orthopedic dentistry, gypsum has a wide range of applications. For a long time it remained the only impression material.
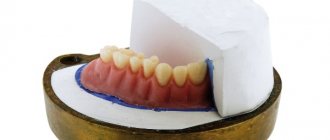
In dental prosthetics, the material is necessary when plastering wax bases with artificial units in a cuvette and models in an occluder, and in the manufacture of metal dentures - to obtain a stamp sample. When making bridge systems, the technician uses plaster to temporarily hold teeth and crowns together .
The material can be used as a modeling material, when all elements are molded from it before casting a metal prosthesis. Extra finely ground gypsum powder is often used for polishing finished prosthetic structures.
Description of material
In nature, the material is an aqueous potassium sulfate salt. In other words, it is a mineral whose crystal lattice is layered, distinguished by the regular arrangement of atoms.
The crystals are colorless and almost transparent, but due to the presence of various impurities (usually quartz, clay, carbonates, pyrite), they have a pink, yellow or black tint. The material is extremely rare in nature without impurities.
To obtain semi-aqueous gypsum, the natural composition is purified from all kinds of impurities. Then it is crushed in special crushers to a powdery state, loaded into boilers and fired for 10-12 hours at 150-190°C.
Based on how much and at what pressure and temperature the gypsum was fired, different grades of it are obtained, differing in strength and hardening period.
You can get plaster of two modifications:
- α-gypsum. The structure is durable, has a small specific surface area, low water requirement, high strength and a long setting period.
- β-gypsum. It is characterized by pronounced reactivity, a wide internal surface, low strength compared to α-gypsum, and requires a larger volume of water for dissolution.
As a dental material, plaster has the following characteristics:
- available;
- allows you to obtain accurate impressions;
- safe;
- tasteless and odorless;
- fragile;
- very low shrinkage rate;
- insoluble in saliva;
- does not swell when wetted with water;
- Easily removed from models using simple release agents (for example, soap solution).
What is dental plaster
To understand the essence of what this dental material is, what stages of processing it goes through before starting to manufacture structures from it, it is worth finding out how it differs from natural gypsum and how it is obtained.
The territory of Russia is rich in minerals, including gypsum, the main deposits of which are concentrated in the Tula, Irkutsk regions, Perm and Krasnodar territories.
When mined, it appears as solid crystals of green, pink, yellow or brown. Pure gypsum is colorless, but due to the admixtures of quartz, pyrite, carbonates, and clay, this natural material acquires color. It is extremely rare without impurities.
Before plaster becomes suitable for use in dentistry, it undergoes special processing. It needs to be converted from its natural state - calcium sulfate dihydrate - to calcium sulfate hemihydrate. To do this, the material is crushed to a powder state. The crushing process in the mill is accompanied by simultaneous heating.
Main methods of obtaining:
- under conditions of high pressure - in an autoclave, for 6 hours at a temperature of 120-124 °C. After this, the material is dried, resulting in α-hemihydrate;
- under normal atmospheric pressure - for 12 hours at temperatures up to 165 °C. In this way the β-hemihydrate is obtained.
The resulting powder is carefully sifted and the following is added to its composition:
- catalysts and inhibitors - substances that affect strength characteristics and solidification rate;
- dyes that give a wide variety of colors;
- flavorings (for example, the taste of “mint” - to increase the patient’s comfort).
The essence of the process described above comes down to the fact that as a result the material acquires strength and the ability to set. The finer the powder is ground, the higher these characteristics are. Compliance with the temperature regime is of particular importance: insufficiently high temperatures leave excess water in the plaster, which prevents its hardening.
When the temperature is exceeded, all the water evaporates and anhydride forms, which sets too quickly. If absolutely all the water evaporates when heated, a material is formed that is incapable of setting. After obtaining hemihydrides, dental materials are prepared from them for various purposes.
Composition and technical characteristics
In terms of its composition, dental gypsum is calcium sulfate dihydrate (CaS04 - 2H20). This is a sedimentary rock with a layered crystal lattice, formed by precipitated sulfate salts.
Gypsum is traditionally mined in lakes and lagoons from aqueous solutions through drying. Also, deposits of natural gypsum are found in mountainous areas along with limestones, rock salt, and clays.
Temperature treatment (firing or calcination) transforms the substance into calcium sulfate hemihydrate (CaS04)2 - H20, further heating - into anhydrite.
In dental practice, a semi-aqueous modification of gypsum is used, which has a number of necessary characteristics, namely:
- dimensional stability and accuracy;
- excellent color contrast;
- environmental safety;
- lack of taste and smell;
- insolubility under the influence of saliva;
- low shrinkage rates;
- affordable price.
When choosing an auxiliary material, it is necessary to pay attention to strength indicators, the degree of water absorption, the absence of metal impurities, the proportion of hydration water and volumetric expansion values.
Manufacturers supply gypsum powder in bags made of paper or cellophane impregnated with a water-repellent substance and packaged in jars equipped with ground-in lids. The packaging must contain information about the trade name of the product, information about the manufacturer and supplier, gypsum class, scope of use, color characteristics, net indicators. Also on the packaging there are recommendations about the rules and shelf life, and the batch number.
How do you get the material?
The crystals are colorless and transparent. However, all kinds of impurities, such as clay, pyrite, quartz or carbonate, color them in various shades - from pink to black. To obtain dental gypsum, the material at the first stage is cleaned of impurities and crushed to a powder state.
Next, the natural material is heated to a temperature sufficient to remove some of the water. There are several manufacturing methods. As a result of their use, medical, model plaster and super plaster are obtained. The composition of medical gypsum of all varieties is identical - (CaS04)2 - H20.
The material differs in structure and particle shape:
- The hemihydrate obtained by firing is medical gypsum (β-hemihydrate). The process of its manufacture is heating in an open boiler until some of the moisture evaporates. The material turns out to be porous and loose. Before use in dental practice, the powder is mixed with water in a 2:1 ratio.
- Model plaster (a-hemihydrate) is produced by autoclaving. When mixing non-porous powder with water, the following proportions are used - 5 parts of gypsum particles to 1-1.5 parts of water.
- To obtain super dental gypsum, the boiling method with the addition of chloride (magnesium or calcium) is used. Chlorides act as deflocculants, preventing the formation of flocs and promoting particle separation. When adding water, the traditional ratio is 5:1.
This is interesting:
Video from a specialist:
How does medical plaster work?
For dental purposes, gypsum dihydrate is heated under the required pressure, mixed with water, after which the entire mixture hardens. The degree of hardening of gypsum is influenced by the following conditions: temperature, dispersion, mixing technique, quality and presence of impurities.
For conservative and post-surgical treatment of fractures and soft tissue damage, immobilization with plaster casts is widely used, which is the best means for external fixation of extremity bone fractures.
It is believed that the method of preparing and applying GP was first described by the Dutch physician A. Mathisen (1852), and in 1854, during the Crimean War, it was described and widely used by M.I. Pirogov. He also paid great attention to caring for the condition of the casted limb.
Gypsum quality control
As mentioned earlier, the quality of gypsum is directly proportional to proper firing and other factors - humidity, amount of water for mixing, etc. In connection with these parameters, there is quality control of gypsum, which consists of testing:
- for strength - a ball is made with a diameter of 1.5-2.5 cm. Descends from a height of 1.5 m to the floor - normally remains intact;
- for flowability - gypsum powder is compressed in a fist - normally there should be no lumps left in the palm, plaster seeps between the fingers;
- for humidity - the plaster is heated on a metal plate with a mirror held over it. If the plaster is of high quality and not damp, then the mirror will not fog up;
- for hardening - a paste-like mass is made (2 parts water and 3 parts gypsum), which hardens within 10-12 minutes and does not crumble when broken;
- for viscosity - make a plaster splint (4-5 layers), apply it to the forearm, after hardening it should retain its given shape, not crumble or delaminate;
- odor - if the gypsum is unsuitable when mixed with water, the smell of hydrogen sulfide (rotten eggs) appears.
Classification
According to GOST No. R51887-2002, ISO 6873, gypsum is divided into 5 classes. This classification is based on the degree of its hardness and scope of application:
- Impression. It has low hardness and a minimal expansion coefficient, quickly hardens, pliable and fairly soft material. Suitable for taking impressions, including those with complete edentia.
- Medical .
Characterized by a normal degree of hardness. It is used for diagnostic models, as well as samples for planning the type and size of a future orthopedic product. Due to insufficient strength, gypsum of this class cannot be used to create working models. - Highly durable .
Belonging to the class of hard minerals, the material has a high strength coefficient. It is applicable for creating removable complete prosthetic systems, prostheses that replace some of the missing units, and is also used in creating a base of fixed, collapsible systems and other similar structures. - Ultra-strong for dies and models with a low expansion coefficient , also in the production of disassembled jaw samples and the implementation of any combined work.
- Extra hard with an adjustable expansion coefficient and the addition of synthetic compounds. This is a rarely used type of plaster, needed to create models that require special precision.
Types of impression materials in orthopedic dentistry, their properties and applications.
Visit here to learn more about diagnostic wax-ups.
At this address https://www.vash-dentist.ru/protezirovanie/nesemnyie-p/slepok-zubov.html we will tell you how to make a dental impression.
Varieties
Differences in the properties of the resulting α- and β-hemihydrates determine the difference in the purpose of dental plaster obtained from them. Since the crystal lattice of β-hemihydrates is less dense, such plasters are less durable. Dental plaster of high strength is produced based on α-hemihydrates.
Note. For comparison: the density of natural gypsum is 2.2-2.5 g/cm3, α-hemihydrate has a density of 2.72-2.73 g/cm3, β-hemihydrate - about 2.68 g/cm3.
According to the classification, there are five types of dental plaster:
- Type I dental plaster. It has low strength indicators, is soft, hardens quickly and is used only for technical purposes for making jaw impressions and plastering models.
- Dental plaster of type II of medium hardness is an auxiliary material; diagnostic models of the jaw are made from it for planning the installation of orthopedic structures. Its strength level is insufficient, so it is not suitable for making working models.
- III dental plaster has a high degree of strength and is hard. Diagnostic and working models of the jaw are made from it. In addition, removable dentures of the full dentition or part thereof, and elements of the base of fixed dentures can be made from third-class dental gypsum.
- Type IV gypsum (super dental gypsum) is a high-strength gypsum of increased hardness. Models and elements of fixed prostheses, combined works requiring a high degree of accuracy, and master models are made from it. This material is also called autoclaved.
- Type V dental plaster is a fairly rare and expensive synthetic material that has increased strength and hardness characteristics. Has an adjustable degree of expansion during hardening. Used for making models of increased complexity and accuracy, master models.
Terms of use
It is important for all specialists working with gypsum mass to adhere to the following rules:
- The material should be kept in a dry place.
- Before filling the storage container with a new portion, it must be thoroughly cleaned.
- All accessories and equipment used to work with plaster must be cleaned after each use.
- A single portion of material should not exceed the volume required to fill 2-3 prints.
- To speed up the hardening of the product, it is not recommended to add hardening accelerators to it. If necessary, it is better to take a quick-hardening brand of gypsum. By increasing the time for mixing the material by a couple of seconds, you can speed up its subsequent hardening.
- To prevent the expansion of the mass from exceeding the required parameters, when mixing, the proportions of water and added powder should be observed.
- The temperature of water and gypsum powder should be 19-20°C. A deviation of this indicator by 1°C upward or downward is allowed.
- The powder must be poured into the water slowly, while giving it time to completely immerse in it. Then within 1 min. Gently mix the mixture with a spatula. Following manual mixing, machine mixing should last no more than 30 seconds.
- The composition is poured into the mold immediately upon completion of mixing. It is unacceptable to increase the pouring time of the mixture or add water to it.
- The impression can be removed only after the temperature in the model has decreased.
Compliance with the listed rules will allow specialists to work with plaster comfortably, economically and quickly.
How to avoid defects in model making
From the description of the technology for making models from dental plaster, it is clear that there are subtleties that must be observed to avoid defects. Let's list the main ones.
First of all, the condition of the jaw impression being filled with wax: it must be free of saliva. Another important aspect is that the structure of the material used is porous. The use of vibrating tables minimizes the risk of cavities.
If there is no such equipment, watch your own manipulations. Be careful when separating the model from the print; if necessary, tap it with a special hammer. Use isolating solutions before pouring the dental plaster to make it easier to separate the model from the impression.
During work, always pay due attention to maintaining the required temperatures of water and material, their proportions, and consistency. Be aware of proper storage conditions, containers and tools. To achieve the highest quality and fastest results, combine, if possible, manual and machine processing.
Application Basics
In order for the manufactured orthopedic structure to be of high quality and meet all technical standards, when working with plaster, all stages of working with it must be followed exactly.
Preparation
Before you begin mixing, you must check that all equipment that will be used in this process is clean and dry.
The remains of the old material in the flask or on the spatula will provoke changes in the timing of expansion and hardening of the new gypsum mass.
It is advisable to mix any type of gypsum under vacuum conditions and with strict adherence to the proportions of all components.
Approximate measurements of ingredients will certainly lead to changes in characteristics and properties.
The mixing force and duration parameters must also match those recommended by the manufacturer.
Water used
To obtain the mixture, tap water is taken that has undergone a period of settling, the temperature of which does not exceed 20(±1)°C.
If the water has high hardness, the hardening time of the mixture is reduced . In this situation, you should take demineralized water.
Powder addition
The gypsum should be poured into the water evenly, but at the same time quickly (the approximate time for adding a portion of powder is 10 seconds). According to the new regulations, this time should be counted from the moment the powder touches the liquid.
Before you start mixing the mixture with a spatula, you must wait until the poured product is completely immersed in water (this takes about 20 seconds).
The mixing time for different classes of gypsum differs. Thus, first-class material is mixed manually for only 30 seconds. Classes 2 to 4, which are alabaster, hard and super hard, are kneaded for 1 minute.
Features of the production of removable dentures with Ivoclar teeth, advantages and disadvantages of the design.
In this publication you can familiarize yourself with the classification of toothless jaws according to Schroeder.
Here https://www.vash-dentist.ru/protezirovanie/semnyie-p/perebazirovki.html we’ll talk about modern material used for relining removable dentures.
Unboxing
According to the standard, the frozen sample is removed from the cast after approximately 30 minutes from the point of pouring. Hydrocolloid (alginate) impressions, after being cleaned, neutralized and disinfected, are cast in plaster because they do not hold a constant volume. Having an aggressive effect on the plaster, unpacking is completed in half an hour.
Important! If other impression materials are used, it is recommended to carry out late unpacking, i.e. after an hour.
Extension
Each class of material expands slightly as it hardens. This indicator is influenced by:
- compound;
- air humidity;
- ambient temperature.
To compare the degree of expansion of different classes, they must be placed in equal conditions.
The permissible expansion values for each class of a given material are given in accordance with ISO 6373 or EN 26873.
Following the standards, the expansion of the product should be indicated in % and after 2 hours, and the strength of the applied impact - after 1 hour (in N/mm2).
If the sample is kept at room temperature and insufficient humidity longer, its expansion decreases by approximately 30%. But in practice it is known that gypsum even needs a slight expansion - it covers the shrinkage of other materials .
Kneading
The process carried out in a vacuum apparatus, as a rule, has a good effect on the material. Machine kneading reduces the time required to obtain a high-quality mixture by almost 2 times compared to hand kneading, i.e., if kneading by hand takes about 1 minute, then kneading by machine takes no more than 30 seconds.
First class gypsum is usually mixed by hand. Adding water to it to thin the consistency or powder to thicken it is not recommended.
Due to such actions, the structure of the material may be disrupted, which will certainly affect the process of its hardening.
Fill
The finished mass should be poured into molds almost immediately. It should not be mixed for more than 2-3 pours.
Important! The time spent on pouring is included in the total time allocated for processing the gypsum.
Upon completion of the period allotted for manipulation, crystals begin to form in the material, and subsequent work with it will be useless.
Also, once the process has begun, detailed reproduction of small elements becomes impossible, and strength is significantly reduced.
These facts must be considered when using a vibrator. Although the use of the apparatus has a positive effect on the characteristics of the finished mixture, vibration should not be continued once hardening has begun.
Modeling
When the shine disappears from the surface of the plaster, within 1 minute. You can make the desired models from it and cut them.
The duration of subsequent hardening is different for each class of gypsum. Thus, this period for hard grades (grade 3) of material is approximately 10-13 minutes. Some of the super hard varieties have a longer cure time.
Model defects
To avoid unpleasant moments, the plane between the gypsum and alginate (hydrocolloid) mass must be processed. The impression based on the alginate mixture is neutralized with water, gypsum powder or a trimmer. This treatment prevents areas that have not yet hardened from spreading over the surface of the sample.
Casts made from a hydrocolloid mixture should be placed in a potassium carbonate or potassium sulfate solution for neutralization. When using impression material with polyester, the manufacturer's instructions must be followed.
Wetting models
Samples should not be subject to harsh effects. If the technology requires steam treatment, the likelihood of their destruction can be reduced by pre-wetting.
Cleaning with a steam jet can cause rapid wear of the surface and level out contours. For this reason, it is best to clean samples with a soft-bristled brush and a special detergent.
Damage to used models during sawing or during preparation can be avoided if they are wetted briefly.
As practice shows, it is most reasonable to work with synthetic varieties of gypsum. The presence of mineral components in it leads to the fact that the expansion process lasts much longer and sometimes reaches up to 30 minutes in some varieties.
It's rare that a technician can wait all this time and start working with wax. If errors occur during modeling, they are not due to non-compliance with the technology of working with wax, but due to the fact that the expansion of the gypsum has not yet finished.
Plaster in orthopedic dentistry
| Item: | Medicine |
| Kind of work: | Essay |
| Language: | Russian |
| Date added: | 10.10.2018 |
- This type of work is not a scientific work, it is not a finished final qualifying work!
- This type of work is a finished result of processing, structuring and formatting collected information intended for use as a source of material for independent preparation of educational work.
If you have a hard time understanding this topic, write to me on WhatsApp, we’ll look into your topic, agree on a deadline, and I’ll help you!
At this link you can find many ready-made essay topics on medicine:
| Many ready-made abstracts on medicine |
Check out these similar threads, they might be useful to you:
| Abrasive precancerous cheilitis Manganotti |
| Lasers in dentistry |
| Damage to soft tissues of the face |
| Hepatitis B, C, D |
Introduction:
Gypsum is one of the most common auxiliary materials used in dental products.
It is a naturally occurring substance formed by precipitation from sulfate-rich solution or weathering of rock. Gypsum occurs in a mineral form in nature - aqueous calcium sulfate CaSO4x2H2O. In orthopedic surgery, calcined gypsum or hemihydrate gypsum (CaSO4) 2xH2O is used. To obtain hemihydrate gypsum, natural gypsum, purified from impurities, is crushed in a special grinding unit in a gypsum mill to a fine and homogeneous powder. Then the ground gypsum is placed in a digester (gypsum oven) and calcined at a temperature of 140 to 190° for 10-12 hours. Depending on the firing temperature, pressure and time, different types of gypsum are obtained, which differ in hardening and strength.
Under certain conditions of heat treatment, gypsum hemihydrate has two changes - α- and β-hemihydrate:
- α-gypsum is obtained by heating 2 atm of gypsum to T = 110-1150C under a pressure of 1.3 atm. This gypsum is called autoclaved super gypsum. α-gypsum is distinguished by its dense structure and small specific surface area, its water consumption is low and its strength is high. The setting conditions are longer.
- β-gypsum is obtained by heating gypsum dihydrate at T=95-1050C and atmospheric pressure. Modified crystals form a capillary-porous structure with a developed internal surface and are more reactive. They require a large amount of water to dissolve, and their strength decreases.
After firing, the gypsum is crushed, specially sifted and packaged in special paper bags or barrels. When gypsum hemihydrate is mixed with water, a hemihydrate is formed and the entire mixture hardens. The reaction is exothermic, that is, accompanied by heating. Plaster installation is very fast. Immediately after mixing with water, thickening of the mass becomes noticeable, but during this period gypsum is still easily formed. Further compression makes molding impossible. Before the setting process, the plasticity of the gypsum mixture does not last long. Gypsum mixed with the consistency of sour cream fills the foam well and ensures its clear imprint. However, the process of strengthening the plaster continues over time, and the maximum strength of the plaster impression and plaster model is achieved by drying to a constant mass in the environment.
Gypsum properties:
- stock status;
- get clear traces of the surface of the prosthesis base tissue;
- harmless;
- there is no unpleasant taste or smell;
- virtually no shrinkage;
- insoluble in saliva;
- it does not swell when wet with water and can be easily separated from the model using the simplest release agents (water, soapy water, etc.);
- vulnerability, damage;
- difficult to remove from the mouth, breaking it into pieces;
- strongly separated from the model;
- not disinfected.
Classification and application
According to GOST R51887-2002, ISO 6873, all dental plasters are divided into five classes according to purpose and hardness:
- Gypsum for printing. Soft and soft gypsum of low hardness. Used to take partial and full impressions (occlusal impressions), including with edentulous jaws. This gypsum sets quickly and has minimal swelling.
- Therapeutic patch. Alabaster gypsum of normal hardness. This type of material is suitable for the production of diagnostic anatomical models and models used for planning orthopedic structures. This class of gypsum is due to auxiliary materials due to the poor strength of its model. Therefore, impression plaster and medical dental plaster are used only for technical purposes and not for making working models.
- Anhydrite class. High strength plaster for models. Removable dentures are used in the manufacture of diagnostic and working models of the jaw. In removable denture technology, it is used to make fixed folding dentures and the base of other products in this series, both for the entire dentition and for replacing missing teeth. Unlike traditional medical plaster, this class of material has sufficient strength properties.
- Super hard. Durable plaster for low expansion models. The highest strength plaster is ideal for creating a foldable jaw model.
- Carbide with the addition of synthetic material. Gypsum, the rate of expansion of which can be adjusted. Specially designed for the production of models requiring high precision. It is used at almost every stage of prosthetics. Used to obtain:
- impression;
- jaw model;
- mask for the face;
- as a casting material;
- when soldering;
- modify the model in the occluder and cuvette.
Rules for working with plaster
To successfully perform dental, orthopedic and dental work with dental plaster, it is important to remember certain rules for their use:
- The dental plaster should be stored in a dry place. The plaster storage container must be cleaned after each new filling.
- Devices and accessories used when using dental plaster must be clean and free of residues of previously used plaster.
- Part of the plaster should be the amount needed to fill 2-3 prints.
- The use of coagulants is unacceptable. If necessary, use gypsum for quick setting or increase the mixing time by a few seconds.
- To obtain the desired expansion of gypsum, the ratio of gypsum to water must be very precisely maintained.
- The temperature of water and gypsum powder should be between 19 and 21°C. The powder is slowly poured into water, then soaked in water and mixed with a spatula. Mechanical kneading should not exceed 30 seconds, manual kneading - 1 minute. The mixture should be poured into the mold immediately after mixing. Trying to add more time by adding vibration or water is unacceptable.
- You can only remove a plaster model from the print if the temperature of the model has dropped.
Mixing plaster
To achieve a complete plaster cast or model, the plaster mixing technique is very important. Pour about 1 part room temperature water into a rubber cup and add 2 parts plaster. Pour the plaster into small cups (saturating the plaster slowly with water to prevent lumps from forming) and stir vigorously with a metal or plastic spatula until the cream is smooth.
The strength of the plaster and the model depends on the consistency of the plaster. If you add more water to the plaster, only the amount needed to form calcium dihydrate will be absorbed, the remaining water will remain free, and the mold or pattern will weaken. However, the amount of water should not be reduced because over-mixed plaster will not produce an accurate print. In addition, when thoroughly mixing gypsum models, pores are formed due to the fact that air bubbles do not have time to reach the surface through the quickly hardened top layer of gypsum. Good plaster sets within 6-8 minutes.
The rate at which gypsum cures depends on many factors, including temperature, degree of grinding (dispersion), mixing method, quality of the gypsum, and the presence of impurities in the gypsum. Increasing the temperature of the mixture to 30-37°C will reduce the setting time of the gypsum. When the temperature rises from 37 to 50°C, the set speed begins to drop significantly, and the setting above 100°C does not occur. The degree of grinding (fineness of the grind) also affects the rate of cure. The greater the dispersion of the gypsum, the larger its surface area and the increased surface area of the two chemically active materials speeds up the process. The rate of cure of hemihydrate also depends on the method of mixing the hemihydrate. The more difficult it is to mix the mixture, the better the contact between the plaster and the water and, therefore, the faster the setting. Wet plaster hardens much more slowly than dry plaster.
This gypsum is best dried at a temperature of 150-170°C.
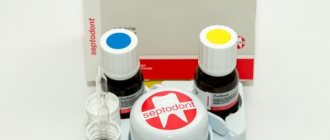
Catalyst salts are especially important when using dental plaster. They usually speed up the setting process of the plaster. The most effective catalysts are potassium or sodium sulfate, potassium or sodium chloride. If the concentration is greater than 3%, the tuning will be slower. Most often, dental clinics use a 2-3% sodium chloride solution as a catalyst. Gypsum curing inhibitors are as follows. Binding glue, 2-3% borax solution, 5-6% sugar solution, 5% ethyl alcohol solution. Do not use a catalyst when making jaw models.
In principle, there is an inverse relationship between the rate at which gypsum sets and its strength. The faster the setting, the lower the strength of the resulting product and vice versa, the slower and stronger the mixture cures. For example, if gypsum is mixed with a borax solution, it will cure much more slowly and become a very strong product. Substances that change the rate of crystallization apply to both the water and the gypsum used for mixing.
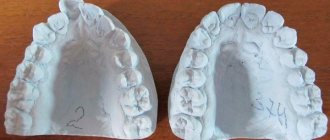
Preparation of jaw models from plaster
Jaw model classification
Booking system:
- Diagnostics, subject of research, clarification of diagnosis and planning the design of future prostheses.
- Controls are diagnostic in nature because they record oral status before, during, and after treatment. Also called production model.
- Dentures workers making appliances.
- Model of the dentition opposite the auxiliary denture.
According to the terms of receipt:
- When the prosthodontist or his assistant uses a non-dismountable, monolithic (for example, alginate impression material, which causes rapid shrinkage), fabricated using some of the same type of materials in the treatment room, or created by a dental technician in the plaster room of a dental laboratory.
- A folding type created in a laboratory by a dental technician. By design, these are always patterns of jaw movement.
- Fireproofs created by dental technicians from fireproof materials after duplicating a plaster model of the jaw in a special cuvette. By design, these are always models of jaw movement for casting alloys.
- The plaster model of the chin has been corrected.
Mode of production:
- Doctoral assessment of the quality of the impression. Impressions are made when the relief of the base of the denture is printed correctly (including transitional transitions, gingival contours, interdental spaces, dentition) and when there are no pores, paired lines or raised spots on the mucous surfaces. Considered suitable.
- Preparing for printing. After cleaning with running water at room temperature, prints must be disinfected by any known method. To reduce the internal stress of the impression material and improve the wettability (flow of plaster), the surface of the printed material is treated with a special liquid (dipping, brushing, aerosol form, etc.). To reduce surface tension. Hera-SBE process, Fixacryl, etc.
- Preparation of plaster. Mix gypsum powder and water. Gypsum mixed with the consistency of sour cream fills the foam well and gives a clear imprint.
- Filling the impression involves manually applying plaster using a spatula (manual version) or directly applying it to the impression through the outlet nozzle of a vacuum mixer (mechanical or hardware version). Eliminating porosity and pitting in a plaster model involves shaking and shaking to fill the impression with plaster, but the most legitimate option is to use a special shaking device. After filling out the tooth pattern, apply additional plaster to the surface of the impression material and begin to form the base of the model.
- The basic design of the plaster model is as follows. Using a spatula. To do this, place the plaster on a flat, level surface of the table, cover the impression filled with plaster, the height of the base is 1.5-2.0 cm, the bottom of the impression tray is parallel to the surface of the table Like this. Remove excess plaster from around the impression and impression tray using a spatula. In addition, the angle between the bottom of the plaster model and the surface of the table is 90°. Using a standard rubber hollow mold (chipped) for the pedestal, after filling with plaster, the plaster-filled cast is placed. The articulatory elements found in most modern articulators are used.
- Once the plaster has crystallized, remove the impression tray and impression material from the jaw model. In this case: When using elastic impression material, remove the impression tray, then the impression material using an instrument (spatula, scalpel, tweezers, etc.). And cut into pieces in a row. When using thermoplastic materials, the impression material must be preheated with warm water. In this case, as a rule, the tray is removed along with the impression material.
- The basis of a plaster model of the jaw, the purpose of which is to achieve uniform thickness and parallelism of the side surface by removing excess plaster using a cutting tool (plaster knife) and a special tool (trimmer) processing.
Folding plaster model. In the world of dental practice, there are many ways to create dismountable plaster models. At the same time, the main material for the models of all systems is gypsum of the third and fourth classes (corresponds to ISO).
Use a resin model without pins. Easy to handle as there is no need to use special drill bits or special adhesives. In addition, this method saves time on superplaster and its preparation.
It consists of the following main stages:
- Preparation of the seal (the edge of the print is cut to the base on the polymer base).
- Preparation of a polymer base with a holding guide. After aerosol deposition of the insulating layer on the inner surface of the polymer base and the holding guide, the latter is installed on the base. The use of such isolation is necessary for the free removal of the retention guide with the remains of the dentition model from the root.
- Getting the model: Fill the impression and the base of the vibrating table continuously with super plaster, then attach the impression to the base.
- Separation of the cast from the model made after crystallization of the gypsum.
- Remove the model from the base using a special press (the holding guide can be freely moved away from the base).
- Remove excess plaster with a carbide cutter and cut the model into pieces using a jigsaw or diamond blade.
- Installation of model fragments after on-site processing for further modeling of the solid cast bridge frame.
- Using 2 pins and a resin model.
Here is the sequence for obtaining a folding model:
- Preparing to Print (Trim the edge of the print to fit evenly on the marking plate).
- A stand with one vertical wall with two slots for attaching markings and the main plate using special materials to enhance the print.
- Installing and centering the clear wiper plate. At this point we will provide an overview of future cutting lines for the model. It is very easy to install the marking pins to exactly match the working pins since there are multiple holes that are identical to each other.
- Preparing the underground work slab: Cover the work slab with protective adhesive film. Remove the identification plate from the stand and align it with the work plate. In this case, a marking pin pulled through the protective film on the build plate outlines the hole of the build pin. The rest of the film in the holes is cleaned using a hand mill.
- A conical-shaped working pin on a prepared base working plate (one end of the pin has a locking recess for fastening with plaster, the other is flat to exactly match the internal shape and diameter of the hole in the working plate for mounting it).
- Lower the work plate with the super patch filled with the print.
- After the plaster has hardened, remove the build plate from the printing plate.
- Separation of the dentition from the base of the model fragment. This operation is very easy and quick thanks to the adhesive film. Excess plaster is then removed using a carbide cutter, the model is sawed using a fine diamond blade of a certain diameter and re-attached to the work plate after proper finishing.
Use a model with a pin and plaster base:
- Trim the print with a special silicone material to even out the edge height.
- Fill the printed material of a row of printed teeth with super plaster. After the plaster has hardened, the dental model is removed from the impression, and excess plaster is removed from the outside and inside using a cutter.
- Leveling the surface relief of the dental model facing the base.
- Using a punch, create a hole in the dental arch model. A double pin with a metal sleeve is inserted and secured in the holder with glue.
- After the glue has dried on the surface of the model fragment (dentition), insulation will be applied to the future base of the model and metal bushings will be installed.
- Obtain the base of the foldable plaster jaw model. To do this, use a standard rubber mold as a base for the model. In this form, super plaster is added little by little. When filling the base rubber foam of the model, a piece of superplastic is applied to the sleeve area to prevent porosity, and then the dental model is placed on the rubber foam.
- Remove the model from the rubber mold (after the plaster has crystallized), remove excess plaster and sand the base using a special trimmer.
- Separate the tooth row from the base and cut it into pieces. After processing it returns to the base nest.
Conclusion
Direct testing in a dental laboratory has shown that the highest quality types of gypsum demonstrate high stability on a spatula and a fluid consistency on a vibrating table, which allows you to maximize the number of non-porous pours from one mixing.
Models made from high-quality gypsum binders are resistant to chipping, perfectly replicate the modeled surface, are well polished, sanded and sawed, and when processing the column, the boundaries of the preparation are not damaged. High quality gypsum raw materials prevent edges from breaking off when removing the model from the impression, ensuring the best modeling result.
High spatial stability is achieved due to the extremely low expansion coefficient of less than a tenth of a percent (0.03%).
Thus, from the presented material we can conclude that the use of α-rock plaster types 3 and 4 by dental technicians and orthopedic dentists, taking into account the rules for making plaster models, makes the work of specialists easier and increases the functional and aesthetic properties of dentures.
Due to the high quality and optimal performance characteristics of materials, specialized specialists have the opportunity to create models that meet the highest requirements. At the same time, the effectiveness of orthopedic treatment of patients increases, and consequently, their quality of life improves.
Shelf life
Gypsum should always be packaged in a moisture-proof container that does not alter its physical and chemical properties. The container must be clearly marked.
It must indicate:
- trade (factory) name of the product;
- the name of the manufacturer and supplier, as well as their address;
- gypsum class;
- the intended scope of its application;
- color (if it is not white);
- smell;
- net indicator;
- indication of the expiration date of the period of application;
- basic storage rules with the obligatory indication that gypsum is susceptible to deterioration at atmospheric pressure and high humidity;
- Issued batch number.
Transportation and subsequent storage is possible only in the original packaging. The shelf life during which the manufacturer guarantees the quality of the released material and the preservation of characteristics subject to storage rules is 1 year.
The video provides additional information on the topic of the article.
Reviews
Plaster is a versatile dental material. The stability of its characteristics and quality, as well as its correct use, facilitate the work of specialists and increase the aesthetic and functional characteristics of prosthetic structures.
At the same time, the material improves the outcome of human treatment, and therefore affects the quality of his life.
You can share your opinion about the advisability of using gypsum in dentistry and its role in dental prosthetics by leaving it in the comments to this article.
If you find an error, please select a piece of text and press Ctrl+Enter.
Tags: gypsum in dentistry, dentures
Did you like the article? stay tuned
Previous article
The procedure for polishing a prosthesis to improve strength and aesthetic qualities
Next article
What is a direct abutment and for what purpose is it used?