Types of fiberglass pins
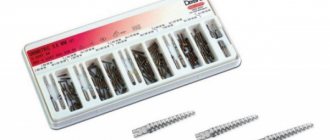
Fiberglass pins in dentistry are classified depending on their shape and are:
- cylindrical - they have good retention (the ability to stay in the root canal) and do not damage the root walls;
- conical - this shape ensures accurate fit into the canal and minimal tissue loss, however, as the cone angle increases, retention decreases;
- cylindrical-conical - this option is suitable for strengthening teeth with slight destruction of the coronal part.
Fiberglass pins can have a volumetric head. This structure makes it possible to restore a badly damaged tooth. The wide coronal part of the pin structure makes it possible to create a stump with minimal use of the composite and ensures good adhesion to the restorative material. The installation of fiberglass pins of this type is especially suitable for subsequent prosthetics with metal-ceramic crowns, bridges and other orthopedic structures.
Indications and contraindications
Range of indications for the use of fiberglass pins:
- Dental restoration using fixed bridges.
- Restoration of damaged tooth surfaces through extensions.
- Installation of splinting systems to ensure stability of mobile teeth.
- When the use of pins made of other materials is not possible.
- For support during one-piece prosthetics with ceramic structures.
Restrictions on implantation of the structure:
- Dentin defects in the subgingival area.
- Granulomas, cysts.
- The root part of the tooth is used as a support.
- Reduced root thickness.
- Low blood clotting.
- Pathologies of the central nervous system, mental disorders.
- Caries.
How to install a fiberglass pin
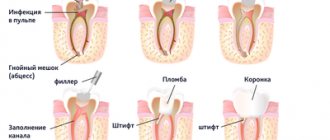
The procedure consists of several stages:
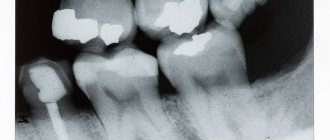
- X-ray diagnostics. To correctly place a fiberglass pin, a specialist must find out the dimensions of the tooth root, the direction of its slope, and identify all existing bends and narrowings.
- Expansion of the root canal using drills of different diameters.
- Root canal disinfection.
- Trying on a fiberglass pin. Mandatory condition: the structure should not be immersed in the canal less than the height of the tooth crown.
- Adhesive root canal preparation. It is degreased with alcohol and treated with phosphoric acid for at least two minutes. Then washed with water and dried.
- Preparation of the pin structure. To securely fix fiberglass pins, they are also treated with alcohol, dried, then sandblasted, etched with phosphoric acid, adhesive and polymerized.
- Root canal treatment. The canal walls are coated with bonding agent, dried and polymerized with a lamp. A thin layer of dual-cure cement is then applied. The rod itself is covered with the same material and placed in the channel. Excess cement is removed.
- Fixation of fiberglass pin by light polymerization.
- Restoration of the coronal part using composite materials or prosthesis.
Fiberglass conical pins with special heads in an aesthetic dentistry clinic
I.K. Lutskaya and N.V. Novak , Belarusian Medical Academy of Postgraduate Education.
Loss of hard dental tissues due to caries, previous filling, endodontic treatment with removal of the roof of the tooth cavity leads to a decrease in the resistance of teeth to functional loads. You can strengthen the root, form a stump and restore the crown of the tooth using pin structures.
Pins used in dentistry can be made in a laboratory or in a factory. The latter are called standard.
Endocanal pins are composed of different materials, which can be divided into two groups: metallic (titanium and stainless steel) and non-metallic (carbon fibers, ceramics and fiberglass). Most often, anti-corrosion steel alloys with the addition of nickel, chromium and molybdenum are used for the manufacture of endocanal pins. Pins based on titanium, which is highly resistant to corrosion due to passivity when in contact with biological fluids, are widely used. Fiber reinforced epoxy resins can also be used. Ceramic pins are indicated in the treatment of the anterior teeth of the upper jaw, since the formation of a gray border along the gingival region is prevented.
Composite filled fiberglass pins are a coaxial thread woven from glass fibers and filled with a composite. Such pins have a combination of the strength of the composite material and the elasticity of the reinforcing woven threads.
The root posts used must meet the following requirements: evenly distribute the occlusal load along the entire length of the root, strengthen the coronal part of the tooth, ensure good retention without weakening the root wall.
Fiberglass pins have several advantages over other designs. The braided structure of the pins provides high bending strength and resistance to mechanical stress. The main physical parameters of fiberglass pins (flexibility, elasticity) are comparable to similar characteristics of dental tissues and composite materials. At the same time, the structure of the “tooth-pin-composite restoration” system determines approximately the same response of its constituent elements to the impact of functional load, its uniform distribution and depreciation. The pins have a good connection with the composite material and the adhesive system. Mechanical retention is provided by the braided fiber structure of the outer surface, and chemical adhesion is provided by the composite filler of the post. Application of fiberglass pins Before installing an intracanal standard pin, the tooth canal must be qualitatively sealed with gutta-percha, after which, based on the X-ray data, the size of the pin is determined: with an increase in the stem, the friction area and holding capacity increase. With a larger surface, the mechanical load on the inner surface of the canal is better distributed, so the length should be as long as possible or at least not less than two-thirds of the length of the root canal, while leaving 3-5 mm in the apical region for the gutta-percha “cushion”. Next, a bed for the pin is formed; for this, the required amount of gutta-percha is removed using a Gates-Glidden, Largo or similar instrument. Then, with a special bur for the root canal, corresponding in diameter to the selected pin, the bed for the anchor is accurately calibrated.
The next step is to prepare the root canal orifice. In this case, a special root cutter creates a shock-absorbing platform, which provides a stable base for the coronal part of the pin and maximum resistance to transmitted loads. A tester (Goude) checks the accuracy of the prepared cavity for the pin.
- Based on the X-ray examination data, the size of the pin is selected. In this case, the thickness of the root canal wall must be at least 1.5 mm, and the length of the selected pin must be at least ⅔ of the length of the canal.
- Using the included reamer, corresponding in size to the selected pin, the canal is developed. The working length of the reamer is fixed using an endostop.
- The canal is cleaned, treated with phosphoric acid, washed and dried.
- The pin is fixed using adhesive systems as follows: the primer and bond are applied in a thin layer and processed in accordance with the instructions, and dual- or chemical-curing composites are used for fixation.
Design advantages:
- Minimal loss of hard tooth tissue during preparation. The strength of the filled root is directly proportional to the amount of remaining hard tissue. When making a structure, there is no need to remove healthy dentin.
- The reinforcement fibers are transparent after polymerization, so the color of the tooth stump will correspond to the selected shade of the composite material.
- FiberMaster TopHead (NTI) is a special fiberglass system that includes FiberMaster fiberglass in-canal tapered posts and TopHead heads adapted to them. The system includes sets of fiberglass pins with tools. The elasticity of these root posts is similar to tooth dentin, therefore the risk of root fracture is reduced to a minimum. The “homogeneity” of the filling-tooth system ensures high bending strength and stability. The vertical and horizontal loads of a structure with a fiberglass pin cause less stress than with a metal pin. The stress in the cement and composite is also reduced. The set of pins includes special burs for the root canal, the function of which is to prepare the root canal for fixation of the pin.
1. Preparing to use FiberMaster tapered pins
Before using intracanal pins, the quality of previous endodontic treatment should be checked (Fig. 1 and 2). The root of the tooth must have a healthy periodontium and should not be affected by caries.
Rice. 1. The root canals of tooth 14 were filled using the lateral condensation method
Rice. 2. Checking the quality of filling using radiography
The depth of installation of the FiberMaster conical pin is at least ⅔ of the length of the root canal. A sufficient thickness of the root canal wall should be at least 1.5 mm. The pin is selected with the maximum diameter.
The chewing surface or the cutting edge of the stump must be prepared for the upcoming tooth restoration. In this case, using a medium-grit diamond instrument, the old filling material and necrotic tooth tissue are removed, and a cavity of the desired shape is prepared (Fig. 3 and 4). A bur with a fine degree of diamond grit smoothes the edges of the hard tissues of the tooth (Fig. 5).
Rice. 3. Preparation of hard tooth tissues with a diamond bur (No. 830L 021 C, NTI)
Rice. 4. Set of NTI burs for aesthetic dentistry (set by Prof. I.K. Lutskaya)
Fig.5. Finishing the edges of the cavity with a diamond bur (No. 379 014SF FG63192, NTI)
2. Indications for use of FiberMaster TopHead
The FiberMaster TopHead system (Fig. 6) is intended for severely damaged teeth, the roots of which do not have any additional damage and still have completely healthy periodontium. TopHeads can also serve as an attachment for temporary crowns. This also creates the opportunity to continue endodontic treatment without limiting esthetics.
Rice. 6. NTI FiberMaster TopHead Taper Pin Set
3. Contraindications
TopHeads are not suitable for teeth that have fractured or cracked roots or dentin that is soft and therefore cannot be stable enough to securely anchor the root post.
4. Preparation instructions
Rotating instruments are disinfected in the usual way, sterilized in an autoclave at 134 °C for 5 minutes and used again. The pins can be disinfected and cleaned of greasy traces with medical 70% alcohol. Sterilization of the pins is not possible. After cleaning, touch the pins only with apodactile touch.
The stability of the restoration system with a crown is improved by the preparation of a circular rim with a vertical preparation of 1.5–2 mm of natural hard tooth tissue. When using instruments, pins and heads of the FiberMaster TopHead system, it is recommended to use a rubber dam, which will prevent aspiration and swallowing of the instrument.
5. Recommendations for use
The surface of the tooth should be treated with a diamond-coated tool. The size of the TopHead and tapered root post should be selected using an x-ray, and the largest size possible should be selected. Heads are used that match the diameter of the pins (Fig. 7).
Rice. 7. Length chart for TopHead NTI taper pins and heads
The drilling depth for the tapered post is selected individually for patients, so that in the apical region the root canal should remain sealed by approximately 3–4 mm. In multi-rooted teeth, it is possible to install several posts - both with and without TopHead, depending on space availability.
The drilling depth with a special root canal bur for the FiberMaster tapered pin is marked using a universal depth gauge and the canal is extended to the required depth (optimal rotation speed: 500–1000 rpm) (Fig. 8 and 9). If the depth gauge is too loose in the canal, you need to activate it with forceps.
Rice. 8. Penetration drill
Rice. 9. Unsealing the root canal and forming a bed for the pin
To install the TopHead head, prepare the stump surface with a two-stage attachment (Fig. 10). To ensure the stability of the system, drill with the tool until the end of the diamond coating (optimal rotation speed 1000–1500 rpm) (Fig. 11).
Rice. 10. Two-stage nozzle for preparing the root canal orifice
Rice. 11. Preparation of a circular rim
It is recommended to prepare the circular rim 1.5–2 mm below the root surface (Fig. 12).
Rice. 12. A shock-absorbing platform has been created for the TopHead NTI: FIBER MASTER
FiberMaster tapered pins should be removed from the packaging using tweezers. The pins should not be touched with your fingers because the oily skin prevents reliable adhesion. The pins are radiopaque, so their position can be monitored on a radiograph. If the pins have been touched with fingers, dirt from the pins should be removed with medical grade 70% alcohol. After cleaning, do not touch the pins with your fingers. Sterilizing them is impossible, since elevated temperatures damage the material.
One of the adhesive bonding methods, either Etch and rinse or Total Etch, should be used (self-etch adhesive systems are not suitable for bonding fiberglass posts). In this case, in any case, it is necessary to use a rubber dam.
The selected pin head should also be removed with tweezers and tried on the tooth (Fig. 13). The root canal, the cavity for the head of the TopHead pin and the surface of the tooth stump are etched with 37% phosphoric acid (Etching) (Fig. 14), after which the phosphoric acid is washed off with water (Rinse) and dried with paper points. The root canal and tooth surface are treated with primer and bonding according to the manufacturer's instructions, and light polymerization is carried out (Fig. 15).
Rice. 13. Trying on the TopHead
Rice. 14. Etching of hard tooth tissues
Rice. 15. Adhesive preparation
The root post and TopHead can also be treated with silane, but this is not a necessary step (Figure 16).
Rice. 16. Taper pin with TopHead head
The post and TopHead should be coated with a dual-cure, low-viscosity luting composite (Figure 17). High-viscosity dual-curing composites are applied using an ultrasonic device. In this case, the ultrasonic tip should be lightly pressed from the occlusal side on the pin and TopHead.
Rice. 17. Fixation of the pin on a dual-curing composite
Dual-curing composites that continue to cure without exposure to light must be used to secure the post and head. The intraradicular pin conducts light only in the apical direction and insufficiently to the canal walls. Therefore, it is necessary to work with a dual or chemically cured composite.
Only adhesive systems that are also suitable for restoring tooth cores can be used. Recommended systems are Futurabond DC and Rebilda DC (VOCO), Luxabond and Luxacore (DMG), Panavia F2 (Kuraray). Systems that use two different adhesion and head materials are not suitable for the TopHead system.
For all adhesive systems, a rubber dam should be used. It should be taken into account that when treating the canal, sodium hypochlorite or hydrogen peroxide cannot be used, since these materials negatively affect the polymerization of the composite. These substances can prevent hardening and adhesion in the canal. The channel should be rinsed with distilled water. Adhesive should be applied to the post and TopHead. Using gentle pressure, first insert the FiberMaster tapered pin into the canal, followed by the TopHead. Both parts must be pushed slowly so that excess adhesive comes out.
The head should be inserted so that it is adjacent to the step. If the head does not fit into the canal, you can tap it with an instrument or use an ultrasonic tip.
Excess material can be used to rebuild the core of the tooth, thus creating a monoblock of one material, which provides improved stability. Then light polymerization should be carried out. When restoring the stump, you need to use the same material that was used to fix the pin. The resulting monoblock is more stable than a combination of two materials.
After fixing the pin, the coronal part is restored with a composite, inlay or crown (Fig. 18). The antagonizing areas of the chewing surface are carefully processed so that minimal chewing load is placed on the structure (Fig. 19). Polishing the surface of the restoration is carried out using fine-grained diamond tools in combination with a composite polisher without significant pressure on the surface of the restoration (Fig. 20 and 21).
Rice. 18. The shape of a tooth is modeled from a composite
Rice. 19. Use a diamond bur (No. 379 018F FG 72341, NTI) to remove excess photopolymer
Rice. 20. Polishing the surface of the restoration with fine-grain (No. 379 014SF FG 63192, NTI)
Rice. 21. Finished design
Dental Times No. 23 (April 2015)
Advantages and disadvantages
Installing fiberglass pins has many advantages:
- Transparency of the design. Thanks to this property, it can be used to restore canines and incisors without damaging their appearance.
- Hypoallergenic. Fiberglass is well tolerated by the body and does not cause unwanted reactions.
- Elasticity. This parameter is close to natural dentin, which eliminates the risk of root fracture.
- No corrosion. Fiberglass pins do not oxidize, providing excellent biocompatibility and structural stability.
- Possibility of repeated endodontic treatment. If necessary, the rod can be removed using a bur, and the likelihood of damaging the tooth is very low, unlike metal structures.
Cons of installing fiberglass pins:
- Less strength compared to metal counterparts. This parameter determines the greater thickness of these products and, accordingly, the need for a significant expansion of the root canal.
- The need for special preparation of the pin structure before use. The more actions a technological process involves, the higher the risk of making a mistake.
- Cost of restoration. Prices for fiberglass pins are much higher than for metal pins.
Preparation and installation
Before you begin installing the structure, preparation is required. To do this, the channels are artificially expanded, which allows the product to be implanted. The doctor also prescribes a number of preliminary studies, including x-rays, which allows you to select the correct pins and restoration methods.
The procedure for installing pins includes the following steps:
- depulpation, preparation of canals and cavity sites;
- fitting of the structure, degreasing the canal using an alcohol solution;
- etching, drying the canal, for which paper points are used;
- rod preparation, disinfection, drying, sandblasting;
- applying a thin layer of cement mixture, introducing the structure into the channel;
- polymerization using light.
Types and manufacturers of fiberglass pins
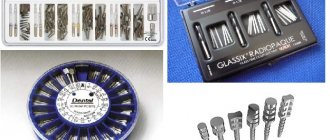
Fiberglass restoration pins are available from a variety of manufacturers. They differ in composition, characteristics, form and features of use:
- The pins have the shape of a truncated cylinder with a rounded end. The mechanical properties of the product are almost identical to the properties of dentin and the composite used for restoration. This allows you to fully restore the tooth and return functionality to the row. But the light conductivity of the structure is lower than its analogues, although it is within acceptable limits.
- The design is distinguished by high aesthetic indicators, which allows the use of pins to restore the frontal area. In addition, the design is elastic, passive, and does not injure tissue during installation. No chemicals are used during processing, but the range of pins is quite limited.
- Relyx Fiber Post. The product is distinguished by a long tip and ease of processing, which facilitates dental procedures. The shrinkage of the cement mass is good, while the formation of pores is excluded, as well as corrosion processes. However, the cost of the design is higher than the price of analogues from other manufacturers.
- A polymer product that is resistant to coloring agents and translucency, which guarantees excellent aesthetic restoration results. Fixation is fast and reliable, the range of models is large.
- Fibrapost Lux. Modern design in the form of intra-channel conical pins. Can be cold sterilized, but has moderate radiopacity. The cost of the products is low, the quality of restoration is very good.
Service life, cost
The service life of the structure is on average 4-5 years. But with the use of high-quality materials and sufficient experience of the doctor, the period can be doubled. However, the patient must maintain hygiene and not exceed the permissible load on the restored units.
The cost of restoration depends on the manufacturer of the product and the degree of tooth destruction. On average, the price ranges from 300 rubles to 1500, the cost can be increased if treatment or other preparatory procedures are required.

